Introduction
Heavy-duty long-haul trucks face constant road vibration and impact every day. These commercial vehicles run on rough highways, gravel construction roads, and bumpy rural routes all year round.
Most fleet technicians prioritize core suspension parts during routine checks. Common inspected parts include chassis shocks, leaf springs, axle airbags, and tires.
However, the cabin shock absorber is one of the most overlooked suspension components. It hides under the cab and wears slowly over time.
Cabin shocks isolate cab vibration and buffer floating movement. They differ fully from load-bearing chassis shock absorbers.
Early wear symptoms are very subtle. Most drivers blame minor cab shake on normal road conditions and ignore hidden damage.
Slow aging gradually kills damping performance. It eventually causes obvious cab bounce, side sway, and loud knocking noises.
Faulty cabin shocks also trigger secondary damage. They wear out cab air springs, rubber bushings, mounting brackets, and interior trim.
These secondary issues raise fleet maintenance costs. They also create safety risks during high-speed truck operation.
This complete guide covers all practical repair knowledge for cabin shock absorbers. You will learn working principles, failure modes, symptoms, causes, diagnosis, replacement steps, and maintenance tips. For more truck suspension troubleshooting support, browse our professional technical support library.
What Is a Cabin Shock Absorber? Basic Working Principle
Basic mechanical knowledge helps you understand cabin shock failure fully. It explains why small damper issues cause major cab suspension problems.
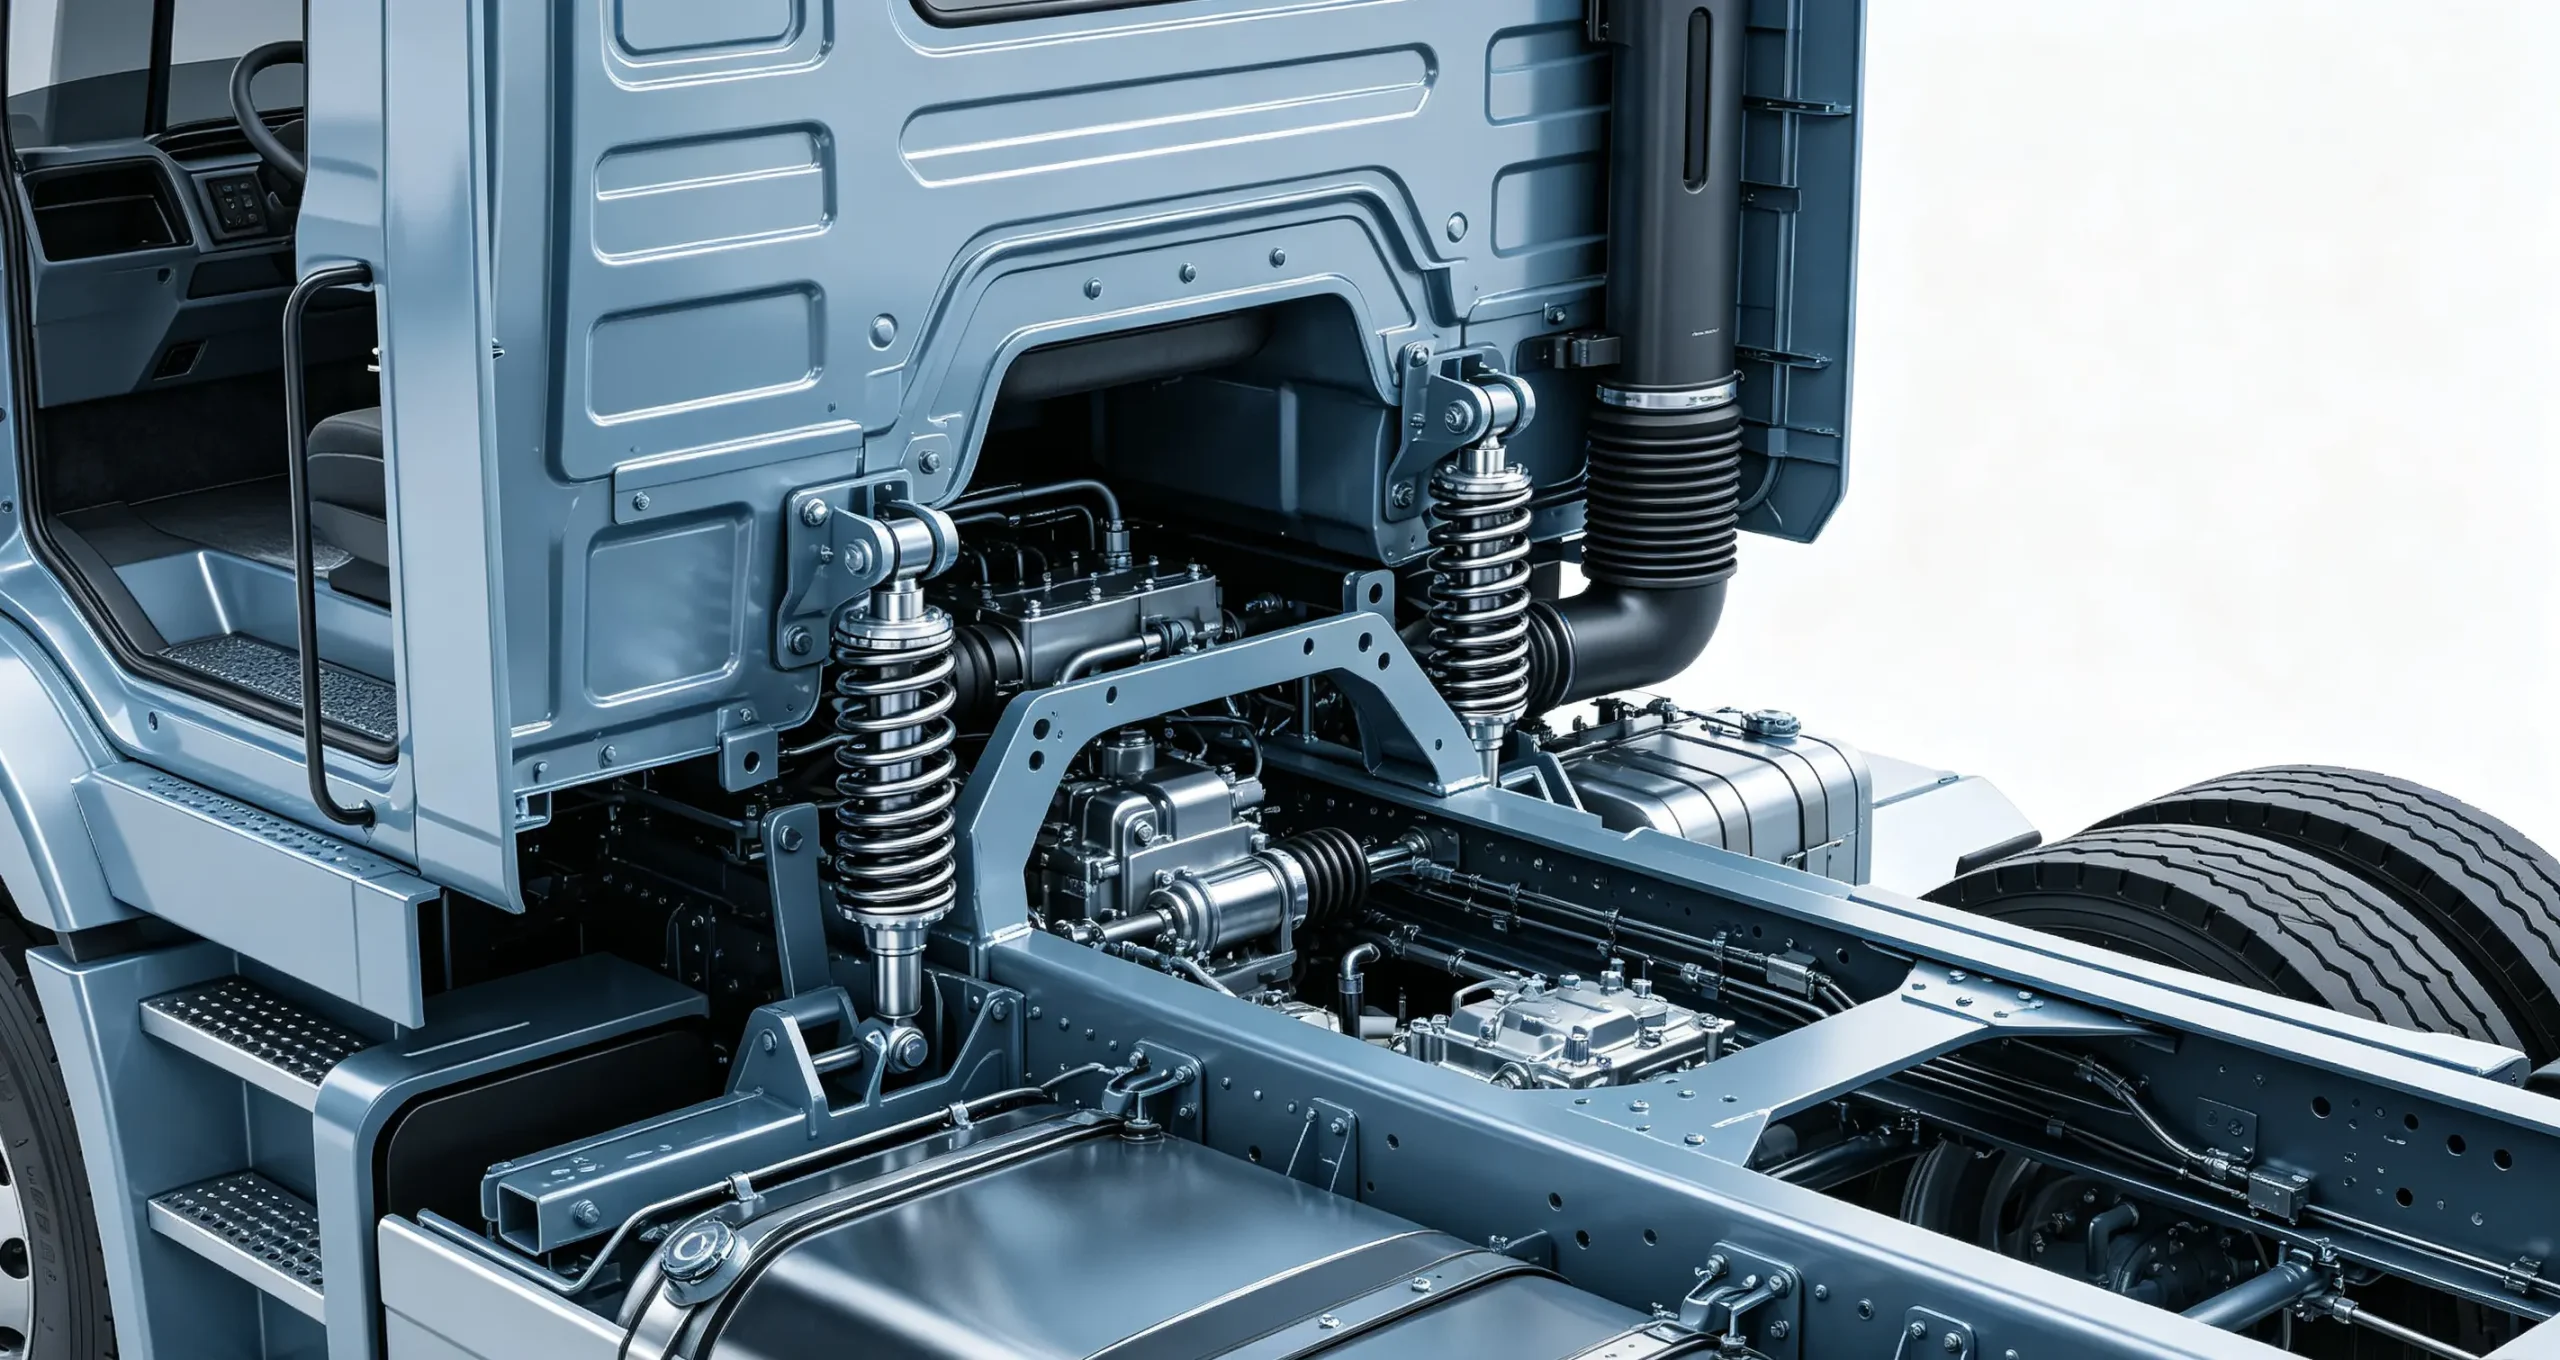
A cabin shock absorber is a dedicated damping part for truck cab suspension systems. It installs between the main truck frame and driver cab.
It works separately from chassis shocks that control axle and frame movement. Most heavy-duty trucks have 2 to 4 cabin shocks at front and rear cab mounting points.
These shocks pair with cab air springs or coil springs. Together, they form a full cab buffer and vibration isolation system.
Most factory cabin shocks use hydraulic or nitrogen-hydraulic integrated structures. Both designs deliver stable damping for daily truck operation.
Key internal parts include a piston rod, damping valve group, sealed oil cylinder, hydraulic oil, and nitrogen cavity. Rubber bushings on both ends enable flexible connection.
Road bumps create frame vibration and offset movement. The cab floats and shifts due to driving inertia during these impacts.
The shock piston rod moves up and down with cab displacement. Hydraulic oil flows through tiny valve holes to create resistance.
This fluid resistance converts vibration kinetic energy into heat. It quickly stops repeated cab bounce and sway.
Simply put, cab springs support weight and buffer pressure. Cabin shocks stop continuous vibration after road impacts.
Quality rubber bushings eliminate metal-on-metal contact. They filter high-frequency micro vibration and reduce under-cab noise. Shop for OEM-grade suspension components at truck suspension system parts for precise fitment.
Core Functions of Healthy Cabin Shock Absorbers
Many new technicians misunderstand cabin shock functions. They only think these parts improve driving comfort.
In reality, functional cabin shocks protect safety, extend part life, and reduce driver fatigue. They serve multiple critical mechanical roles.
First, they suppress vertical cab bounce. They absorb impact from speed bumps, road joints, and potholes for stable cab performance.
Failed shocks let the cab bounce repeatedly. Uncontrolled bounce blurs vision and causes severe driver dizziness on long hauls.
Second, quality shocks limit lateral cab sway. They stabilize the cab during lane changes, crosswinds, and curved road driving.
Controlled lateral movement keeps steering and pedals stable. It prevents vehicle deviation caused by loose cab suspension.
Third, cabin shocks protect the full cab suspension assembly. They absorb most vibration before it reaches air springs and brackets.
Without working shocks, all impact targets air springs, bolts, and bushings. This leads to fast aging, air leaks, and bracket deformation.
Fourth, good dampers reduce interior rattles. Controlled cab movement stops friction between plastic trim, doors, and mirrors.
Stable vibration levels also protect onboard electronics. They lower the failure rate of cab electrical components.
Overall, cabin shock health defines cab suspension stability. One failed shock triggers a chain of linked suspension faults.
6 Common Cabin Shock Absorber Failure Modes
Fleet repair data shows consistent cabin shock failure patterns. Each failure type produces unique symptoms and damage levels.
Learning these modes helps you avoid misdiagnosis. It prevents confusing shock faults with air spring or chassis issues.
1. Hydraulic Oil Leakage & Seal Failure (Most Common)
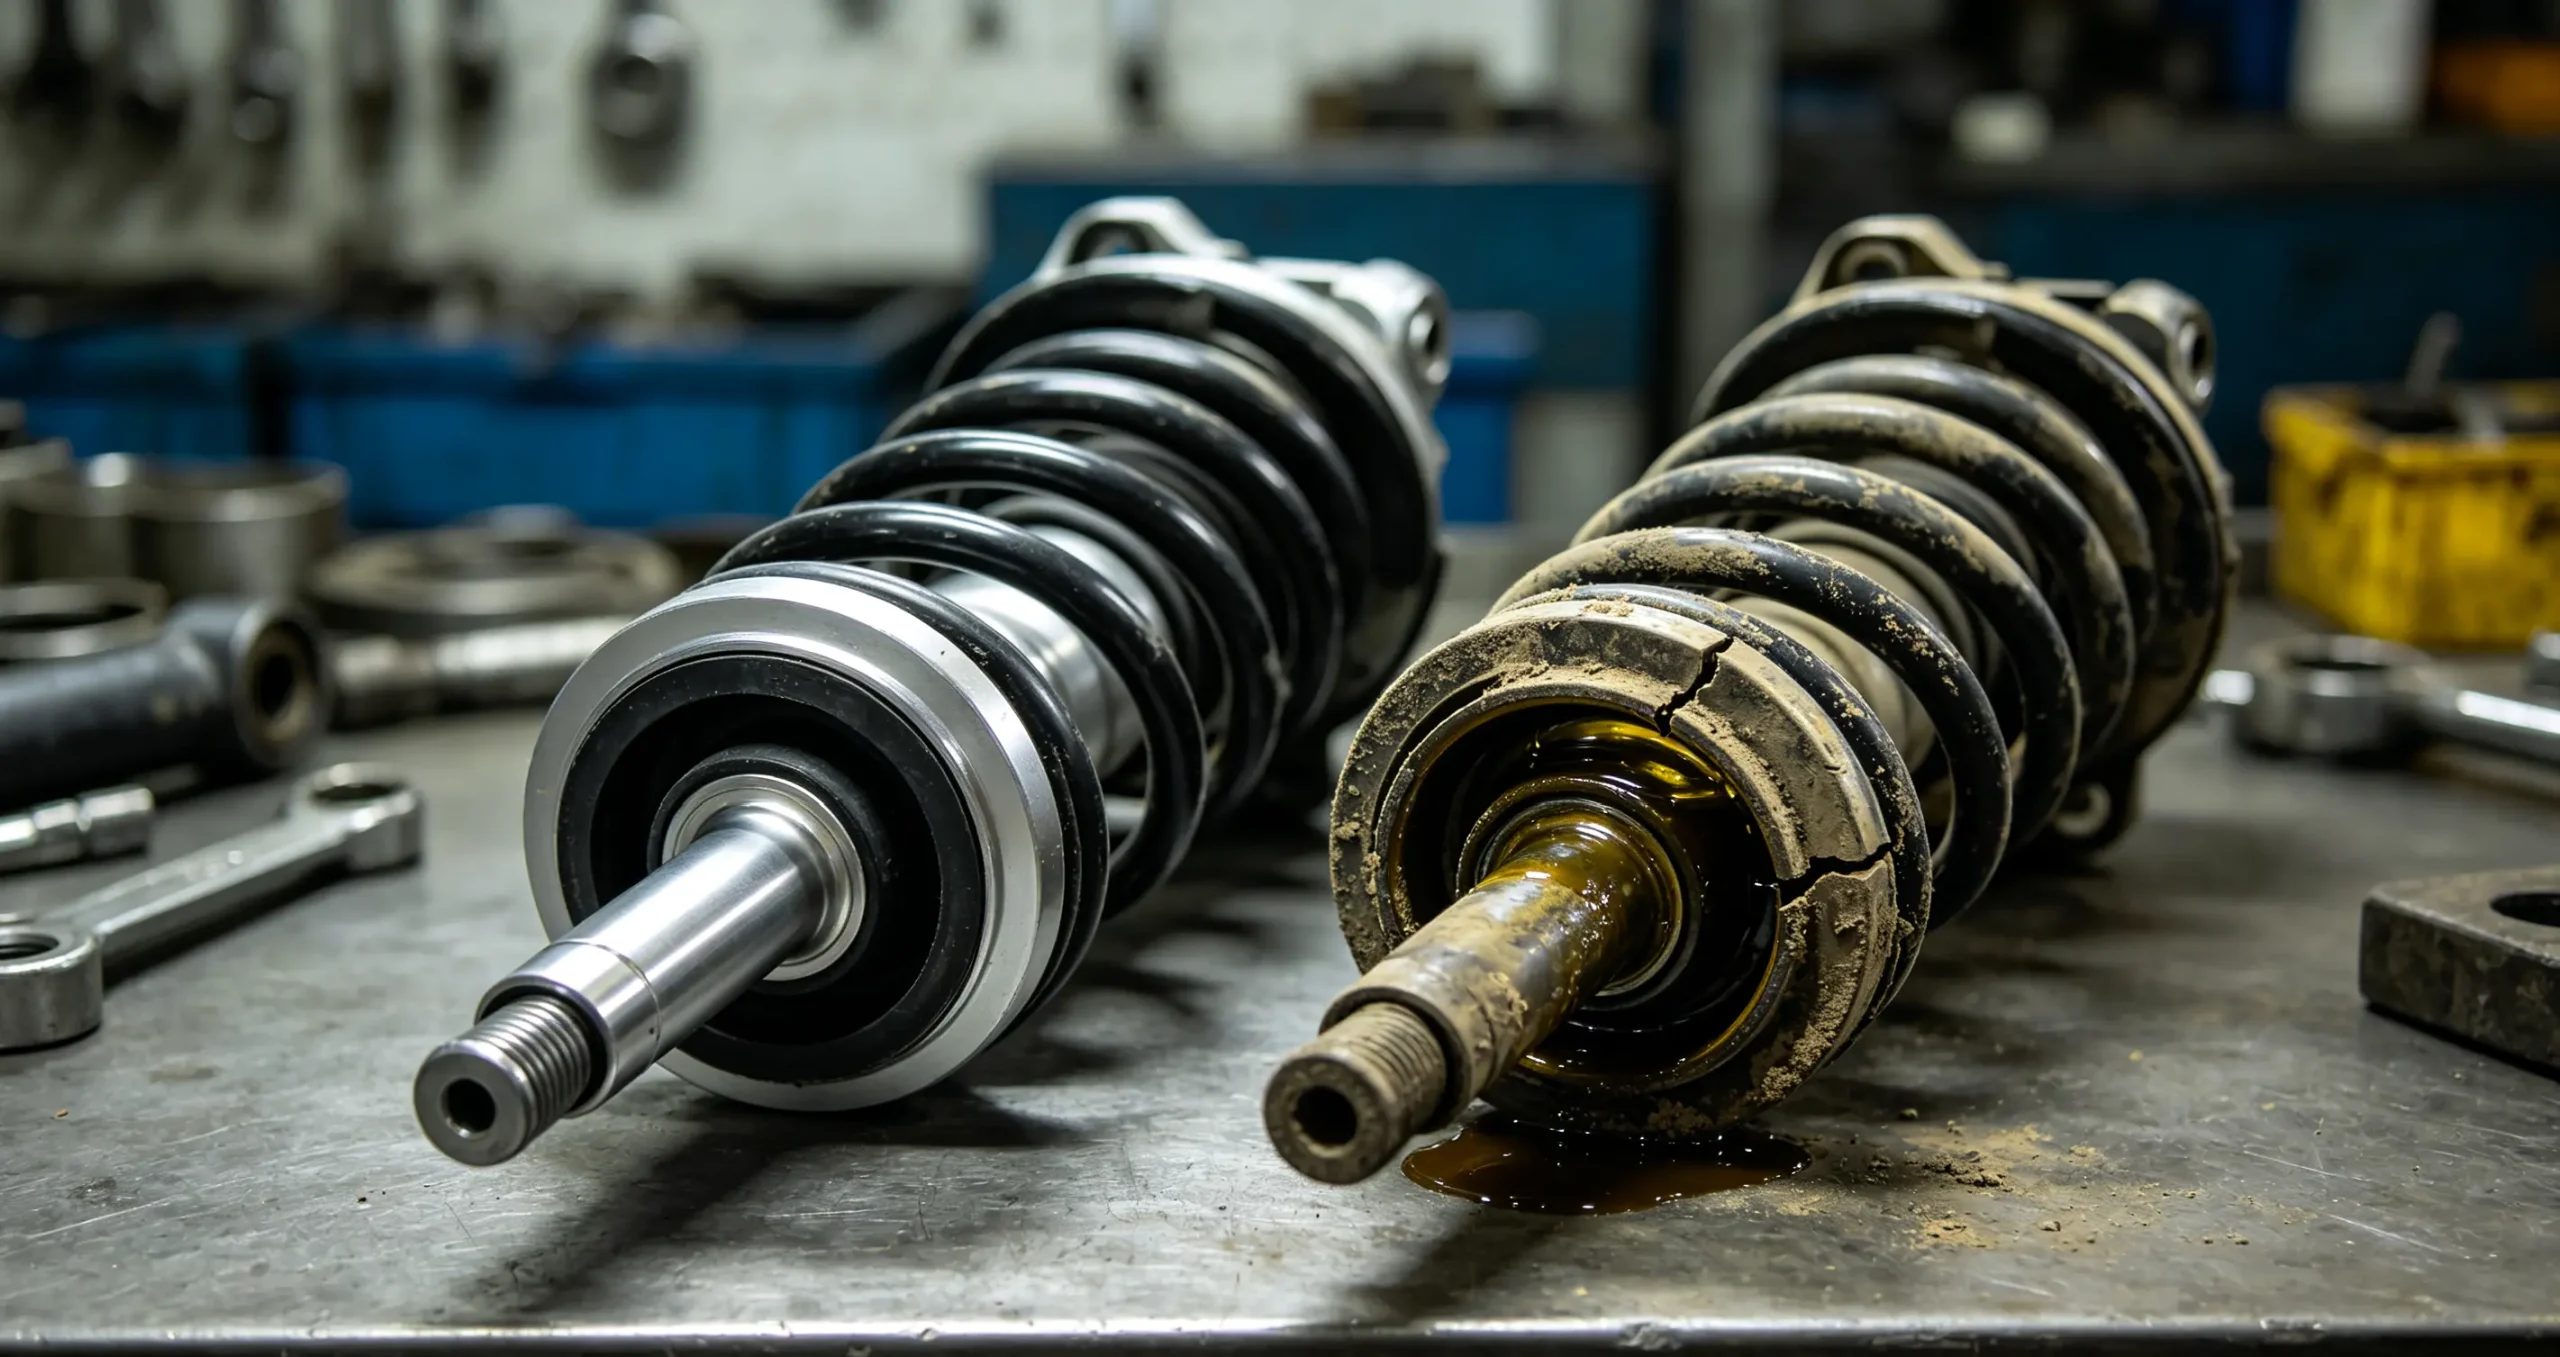
Oil leakage ranks as the top cabin shock failure. All hydraulic shocks rely on sealed internal oil for damping resistance.
Long piston rod movement wears and hardens top seal rubber. Road dust, mud, and rain speed up seal deterioration.
Early leakage creates a faint oil film on the piston rod. Driving changes are minimal and hard to notice at this stage.
Advanced leakage lets large amounts of oil flow down the cylinder. Mixed with road dust, it forms thick black grime on the shock surface.
Lost oil reduces internal pressure and damping power. The clearest result is persistent cab bounce and weak vibration reduction.
2. Internal Valve Fatigue & Damping Attenuation (Hidden Fault)
Valve fatigue is the hardest cabin shock fault to detect. The shock looks completely intact with zero external leakage.
Internal valve parts endure millions of compression cycles. Continuous use enlarges valve holes and weakens valve plate elasticity.
Worn valves let oil flow too fast with low resistance. Damping performance drops sharply despite no visible damage.
This hidden issue plagues high-mileage trucks. Most techs only check for leaks and miss internal valve wear entirely.
3. Nitrogen Loss & Oil Foaming (Gas-Charged Shocks)
Modern trucks use nitrogen-filled cabin shocks. Nitrogen gas prevents oil foaming and maintains steady damping.
Aging internal gas seals leak slowly over time. Dropping nitrogen pressure ruins stable shock performance.
Low pressure causes heavy oil foaming during high-frequency movement. Foamy oil cannot deliver consistent damping force.
Drivers feel stable performance at first. Bounce and sway worsen significantly after driving on rough roads for extended periods.
4. Piston Rod Bending & Cylinder Deformation
Physical damage comes from external impact and bad maintenance habits. Flying stones, chassis scrapes, and wrong jack points bend piston rods.
Bent rods cannot move straight inside the cylinder. Offset movement creates uneven resistance and occasional sticking.
Eccentric rod movement tears internal seals and causes sudden large leaks. It also creates rigid friction and abnormal noise.
Visual inspection easily catches this fault. Simply lift the cab and check shock straightness for fast confirmation.
5. End Bushing Cracking, Aging & Detachment
Rubber end bushings handle constant compression, torsion, and vibration. Road salt, water, and oil accelerate rubber aging year-round.
Aged bushings harden, crack, deform, or break off completely. Failed bushings create rigid metal-to-metal connections.
Rigid contact produces loud clunking noises over every bump. Drivers hear clear knocking sounds from under the cab.
Important note: bad bushings do not mean a bad shock body. You only need bushing replacement to fix most noise issues.
6. Internal Blockage & Shock Locking (Severe Late Failure)
Dust buildup, metal debris, and degraded oil clog internal shock passages over time. This creates permanent blockages.
Blocked oil passages stop fluid circulation. The piston rod locks in place and loses all free movement.
Locked shocks turn into rigid support bars. They eliminate all cab suspension flexibility and transfer full impact to the cab.
Severe jitter and rigid impact noise follow. Long-term locking causes cab bracket stress concentration and structural cracking risks.
10 Typical Symptoms of Bad Cabin Shock Absorbers
Cabin shock failure progresses slowly. Early signs are intermittent and mild, while late symptoms are constant and severe.
Symptoms grow more obvious with higher mileage and rougher road conditions. You can locate faults fast with this clear symptom guide.
1. Repeated Cab Bounce After Bumps (Core Symptom)
Persistent repeated bounce is the most definitive bad cabin shock sign. Healthy cabs stabilize instantly after hitting a bump.
Weak damping lets the cab bounce 3 to 5 times continuously. It fails to settle quickly after small potholes or road seams.
This symptom stands out most on gravel and rural roads. Smooth highways mask early-stage damping issues effectively.
2. Excessive Cab Sway During Lane Changes & Crosswinds
Good shocks restrict lateral cab movement. Failed shocks lose all side-to-side damping capability.
The cab floats and swings noticeably during high-speed lane changes and strong crosswind conditions.
The cab fails to reset instantly after turns. Repeated side sway ruins driver control and causes rapid fatigue.
3. Continuous Under-Cab Clunking & Knocking Noise
Cracked bushings and loose shock mounts create distinct mechanical collision noise. Noise matches every road bump frequency.
Sound grows louder on rough roads and disappears on flat pavement. Most techs misdiagnose this as loose chassis bolts.
In most cases, worn cabin shock bushings are the true source of under-cab knocking noise.
4. Severe Driver Fatigue & Steering Wheel Vibration
Failed shocks transmit unfiltered road vibration straight to the cab, seat, and steering wheel.
Drivers feel constant minor steering jitter. Continuous operation causes back soreness, shoulder stiffness, and dizziness.
This fatigue builds cumulatively. Long-term operation with bad shocks increases accident risk significantly.
5. Visible Oil Stains & Dirt Buildup on Shock Surface
External oil residue is the easiest visual failure sign. Lifted cab inspection reveals wet stains and black grime on shocks.
Thicker dirt layers mean worse leakage. Dry, clean piston rods confirm no severe seal damage for the time being.
6. Premature Air Spring & Bump Stop Wear
Weak shocks cannot limit cab travel range. The cab overextends and slams repeatedly on rubber bump stops.
Continuous rigid impact crushes and cracks bump stops. Overextended movement also accelerates air spring aging and leakage.
Frequent air spring and bump stop damage always requires immediate cabin shock inspection.
7. Interior Rattle & Blurry Rearview Mirror Shake
Uncontrolled cab vibration loosens interior plastic panels and trim. Constant rattling occurs during normal driving.
Rearview mirrors shake violently and blur vision. Tightening interior screws never fixes the root vibration source.
8. Delayed Cab Reset After Vibration
Healthy suspensions reset instantly after movement. Bad shocks create obvious reset delay after tilting or bouncing.
The cab stays tilted briefly before slowly leveling out. This delay confirms insufficient internal damping force.
9. Uneven Cab Height & Tilted Posture
Single-shock failure creates unbalanced left-right cab support. The cab sits visibly uneven on one side.
This tilt is very obvious on mechanical cab suspensions. Air suspension trucks mask the issue slightly.
10. Jitter During Acceleration & Deceleration
The cab shifts forward and backward during fast speed changes. Failed shocks cannot buffer inertial cab movement.
This jitter harms operating smoothness. Severe cases even cause unstable gear shifting performance.
Root Causes of Premature Cabin Shock Failure
Repeated shock failure happens due to untreated root causes. Simply replacing parts without fixing issues leads to fast re-failure.
These six core reasons cause early cabin shock aging based on long-term fleet repair data.
1. Severe & Rough Road Conditions
Construction, mining, and rural trucks run on bumpy gravel roads daily. Cab suspensions endure nonstop high-frequency impact.
Continuous heavy cycling wears valves, ages seals, and fatigues bushings. Service life shortens drastically under harsh conditions.
2. Overloaded Cab & Unbalanced Weight
Many drivers store heavy tools and supplies inside the cab long-term. This creates excessive static suspension load.
Extra cab weight increases shock compression pressure. Every road impact delivers heavier stress and faster fatigue damage.
3. Environmental Contamination & Corrosion
Under-cab shocks face constant exposure to mud, rain, and road salt. Coastal salt fog speeds up metal rust and rubber decay.
Abrasive sediment scratches polished piston rods. Tiny scratches destroy seals and trigger progressive oil leakage.
4. Missing Preventive Inspection Routines
Most fleet checklists ignore cabin shock inspection. Techs focus only on engines, chassis, and brakes during service.
Hidden mounting positions let minor faults accumulate. Small issues eventually turn into severe damping failure.
5. Non-Standard Installation & Binding Stress
Misaligned holes, wrong angles, and over-torqued bolts create permanent shock binding stress.
Bound shocks cannot move freely in full stroke range. Localized stress causes rapid deformation and wear.
6. Low-Quality Aftermarket Replacement Parts
Cheap aftermarket shocks use weak materials and unqualified valve designs. They fail quickly under heavy truck loads.
Always choose OEM-grade components for long service life. Browse genuine truck parts catalog for reliable suspension accessories.
Professional Step-by-Step Cabin Shock Diagnosis Method
Accurate diagnosis eliminates misdiagnosis and repeated repairs. Follow this standardized workshop process for precise results.
1. Road Test & Symptom Recording
Test the truck on flat highways, bumpy provincial roads, and gravel surfaces separately. Reproduce all vibration symptoms.
Record bounce, sway, noise, and vibration patterns. Clearly distinguish cab suspension faults from chassis issues.
2. Rule Out Other Suspension Faults First
Eliminate bad chassis shocks, leaf springs, tires, and air springs before checking cabin dampers. These parts create similar symptoms.
Learn air spring troubleshooting from our bad cab air spring symptoms guide to avoid confusion.
3. Under-Cab Visual Inspection
Park on level ground and safely lock the lifted cab. Inspect every cabin shock one by one.
Check for leaks, cylinder deformation, bent rods, cracked bushings, and collision damage marks.
4. Manual Cab Rock Static Test
Shake the cab firmly up and down and side to side. Release and observe stabilization speed closely.
Repeated bouncing or swaying without fast stabilization confirms severe damping attenuation.
5. Shock Free Stroke Detection
Manually push and pull each shock. Smooth, even resistance means healthy function. Sticking and jitter confirm failure.
6. Disassembly Bench Test
Test removed shocks through full compression and extension. Qualified units deliver uniform resistance across the entire stroke.
Complete Standard Cabin Shock Replacement Guide
Always replace cabin shocks in pairs. Balanced left-right damping prevents uneven cab stress and early new part failure.
Pre-Work Safety Preparation
Park on flat solid ground, engage parking brake, and chock all wheels to prevent sliding.
Lift the cab slowly and lock the support rod firmly. Disconnect the battery negative cable for full safety.
Prepare torque wrenches, socket sets, penetrating lubricant, new shocks, new bolts, and protective gear.
Step 1: Release Cab Air Pressure (Air Suspension Trucks)
Fully bleed air spring pressure to eliminate shock preload. This makes disassembly safer and easier.
Pressure release prevents bolt kickback and component damage during part removal.
Step 2: Lubricate & Remove Mounting Fasteners
Spray penetrating oil on rusted bolts. Let it soak 5 to 10 minutes to dissolve rust and dirt.
Remove top bolts first, then bottom fasteners. Sort and discard old worn hardware properly.
Step 3: Remove Old Shock & Inspect Mounts
Take out the failed shock and confirm its failure mode. Inspect mounting brackets for cracks or deformation.
Repair or replace damaged brackets before installing new shocks to ensure proper fitment.
Step 4: Pre-Assemble New Shock Bushings
Install new rubber bushings and metal sleeves on the new shock. Do not over-compress rubber components.
Verify factory installation direction before positioning the new unit.
Step 5: Align New Shock Naturally
Position the new shock and adjust cab height for natural hole alignment. Never pry mounting holes forcibly.
Forced alignment creates permanent binding and rapid new shock failure.
Step 6: Hand-Tighten All Bolts
Thread every bolt by hand first. Confirm zero cross-threading before final torque tightening.
Step 7: Torque Bolts Under Loaded Cab State
Reinflate air springs to restore normal cab ride height. Suspension must sit under working load for accurate torque.
Use OEM standard torque values. Load-state tightening prevents bushing torsion and cracking.
Step 8: Check Full Stroke Clearance
Manually rock the cab to test full shock movement. Confirm no friction, collision, or binding with nearby parts.
Step 9: Road Test & Final Verification
Lower the cab, remove wheel chocks, and test drive. Confirm all bounce, sway, and noise issues are fully resolved.
7 Common Replacement Mistakes That Cause Repeated Failure
Most recurring cabin shock faults come from non-standard repair practices. Avoid these frequent technician errors.
First, never replace only one single shock. Asymmetric damping creates unbalanced cab stress and fast new wear.
Second, avoid torqueing bolts on unloaded cabs. This twists bushings and causes immediate cracking.
Third, discard old rusted bolts and deformed gaskets. Reused hardware loosens and creates noise faults.
Fourth, skip low-quality aftermarket shocks. They cannot withstand heavy-duty truck operating loads.
Fifth, always inspect paired parts. Worn air springs and bump stops overload new shocks quickly.
Sixth, confirm correct installation angles. Misaligned shocks bind and lose damping uniformity.
Seventh, never skip post-install road tests. Hidden clearance issues only show during real driving. Contact our professional technical team for tough repair troubleshooting.
Long-Term Maintenance Tips to Extend Shock Service Life
Simple regular maintenance doubles cabin shock lifespan. It effectively cuts overall fleet repair costs.
Add cabin shock inspection to every oil change. Check for leaks, bushing decay, and deformation routinely.
Keep piston rod surfaces clean and scratch-free. Clean rods prevent seal damage and oil leakage.
Avoid heavy unnecessary items inside the cab. Reduced static load lowers suspension fatigue stress.
Repair air spring leaks immediately. Stable air pressure prevents excessive shock stroke travel.
Avoid aggressive driving over bumps. Smooth operation reduces impact damage to all suspension parts.
Clean under-cab dirt and sediment regularly to reduce corrosion risks. Learn fleet maintenance strategies from our fleet cooperation cases.

Fault Differentiation: Cabin Shock vs Other Suspension Issues
Accurate fault separation saves unnecessary repairs. Use these clear distinguishing features.
Bad cabin shocks: Repeated cab bounce after single bumps, intermittent sway, no air leakage sound.
Bad cab air springs: Audible air hissing, sagging cab height, no repeated bounce cycle.
Loose cab bolts: Random knocking noise, no noticeable bounce or sway instability.
Faulty chassis shocks: Overall frame jitter, not isolated to cab-only vibration.
Access full truck repair resources at our official homepage for more diagnosis guides.
FAQs About Cabin Shock Absorbers
Q1: Can I drive with a bad cabin shock absorber?
A: Minor damping wear allows short-distance travel. Long driving accelerates part damage and driver fatigue. Severe leaks or locked shocks require immediate replacement for safety.
Q2: What is the standard service life of truck cabin shocks?
A: Quality OEM shocks last 200,000 to 400,000 highway miles. Rough off-road conditions reduce lifespan to 80,000–150,000 miles.
Q3: Do I need to replace all four cabin shocks at once?
A: Pair replacement (front pair + rear pair) meets minimum standards. High-mileage trucks benefit most from full four-shock replacement for balanced performance.
Q4: Why does cab vibration remain after shock replacement?
A: Common causes include incorrect bolt torque, damaged air springs, worn bump stops, and misaligned installation angles. Recheck all paired suspension components.
Q5: Is bushing replacement enough for minor shock faults?
A: Yes. If the shock body is intact and only bushings fail, replace only bushings to save maintenance costs.
Final Conclusion
Cabin shock absorbers are small yet critical cab suspension components. They control vibration, limit sway, and protect surrounding truck parts.
Most unexplained cab bounce, sway, and noise issues stem from hidden cabin shock aging. Poor visibility causes consistent maintenance oversight.
This full guide equips you to diagnose, repair, and maintain cabin shocks professionally. It eliminates recurring cab suspension problems completely.
Combined with good driving habits and routine checks, these practices extend suspension life, reduce downtime, and lower fleet costs.
Mettlead provides OEM-grade heavy-duty truck suspension parts and professional technical support for global repair shops and fleet enterprises.


