Learn how to replace a stabilizer bar link on heavy duty & commercial trucks: symptoms, tools, torque specs, and step-by-step removal & install tips.
This is a shop-floor reference written for fleet technicians, owner-operators, and heavy-duty service professionals who want to get the job done right the first time. It covers diagnosis, tooling, torque discipline, and the small details that separate a rattle-free repair from a comeback.
If you have ever chased a mysterious front-end clunk over a leaf-spring-equipped tractor, you already know how much a small link can affect ride quality and safety. Below, we walk through the full process from symptom to road test, with honest guidance on when to defer to a specialist.
Key Takeaways
- The Stabilizer Bar Link connects the sway (anti-roll) bar to the suspension or axle, controlling body roll under load — a small part with an outsized safety role.
- Top failure symptoms: clunking or knocking over bumps, excessive body roll, wander, and torn ball-stud boots with visible play.
- Plan roughly 45 minutes to 2 hours per side on most heavy chassis, longer if fasteners are seized.
- Always torque to the OEM service-manual value — never guess. Under-torque loosens; over-torque cracks studs and boots.
- Replace links in pairs whenever practical; a worn opposite side usually follows soon after.
- Essential tooling: calibrated torque wrench, breaker bar, penetrating oil, ball-joint separator, and a heat source for seized hardware.
- Defer to a professional shop when press work, torch cutting near brake lines, or alignment verification exceeds your bay’s capability.
What Is a Stabilizer Bar Link and Why It Matters
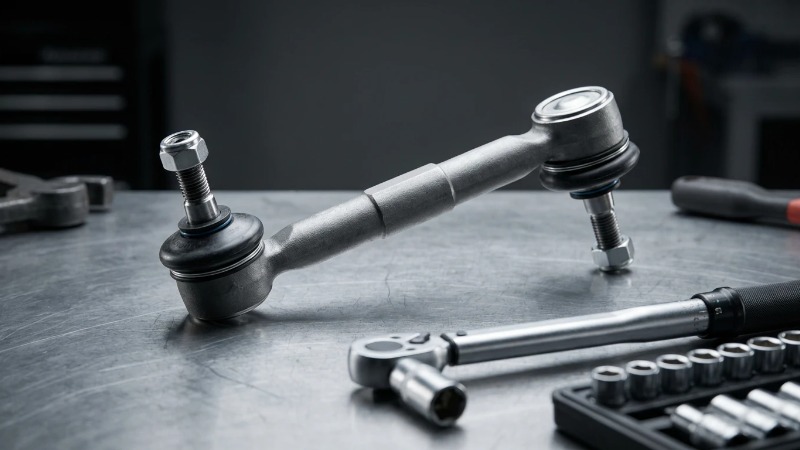
A stabilizer bar link is the short connecting rod that ties the sway bar to a control arm, axle, or frame bracket. On a heavy-duty truck it transfers roll forces from one side of the suspension to the other, keeping the chassis flatter through corners and under uneven loading.
When this link wears out, the sway bar can no longer do its job effectively. The result is more body roll, sloppier handling, and often an annoying knock that drivers notice long before a formal inspection flags it.
The Role of the Stabilizer Bar Link in Front End Suspension Components
The sway bar itself is a torsion spring. It only works when both ends are firmly tied into the suspension, and the links are what make that connection. Each link typically uses a ball stud at one or both ends so the joint can articulate as the suspension cycles.
Among front end suspension components, the link is one of the smallest yet most abused. It moves constantly, sits low in the debris path, and takes every road impact the tires transmit. That relentless duty cycle is why it wears faster than heavier structural parts.
On commercial chassis the link often works alongside bushings, brackets, and the bar itself. When you inspect one, you should look at the whole assembly — a failing link rarely fails in isolation.
Heavy Duty vs. Light Duty: What Changes on Commercial Trucks
Light-duty passenger links are usually sealed and disposable. Heavy-duty truck links are built to higher load ratings, and many are greaseable so they can be maintained rather than tossed at the first squeak.
Gross vehicle weight rating changes everything. A tractor operating near its GVWR puts far more roll load through the link than a pickup ever will, and off-road or vocational duty cycles add constant articulation and grit.
Because of that, a proper heavy duty truck sway bar link replacement is not just a swap — it is a load-rating decision. Choosing an undersized or poorly built link on a Class 7 or Class 8 chassis invites early failure and repeat labor.
Symptoms of a Failing Stabilizer Bar Link
Most link failures announce themselves before they become dangerous. Catching the early signs saves you from cascading wear on the bushings and bar. Watch for these red flags:
- A metallic clunk or knock over bumps, expansion joints, or driveways.
- Increased body roll or a “top-heavy” feel through corners under load.
- Steering wander or a vague, drifting front end.
- Visible play when you grab and shake the link by hand.
- A torn or missing ball-stud boot with grease slung around it.
Audible Warning Signs (Clunks, Rattles, Knocking)
Link noise typically comes from the ball stud rattling in a worn socket. It is sharp, metallic, and repeats with road irregularities rather than with throttle or braking.
The trick is separating link noise from bushing or ball-joint noise. Bushing noise tends to be a duller creak or groan, while a bad tie-rod or ball joint often shows up during steering input. A quick pry-bar check at the link, with a helper rocking the truck, usually isolates the culprit.
Handling and Safety Indicators
Drivers often report the problem before you ever put it on a lift. Complaints like “it leans harder than it used to” or “it feels loose when I’m loaded in a curve” are classic link symptoms.
Excessive body roll and reduced cornering stability matter most on loaded tractors and vocational trucks. When roll control degrades, the vehicle becomes less predictable in emergency maneuvers — a genuine safety concern, not just a comfort issue.
Visual and Physical Inspection Cues
Get under the truck and look closely. Torn boots let water and grit destroy the joint, corrosion locks up the ball stud, and elongated mounting holes indicate the bracket has been hammering itself loose.
Grab the link and push-pull it. Any perceptible free play at the ball stud confirms wear. If the boot is split and the joint is dry, the link is on borrowed time regardless of how it currently sounds.
| Symptom | Likely Cause | Urgency Level |
|---|---|---|
| Sharp clunk over bumps | Worn ball stud / loose link | Medium — repair soon |
| Torn boot, grease slung out | Contaminated, drying joint | Medium — schedule replacement |
| Excessive body roll under load | Failed or disconnected link | High — safety concern |
| Broken/dangling link | Complete link failure | Critical — do not operate loaded |
| Elongated mounting holes | Chronic looseness, bracket wear | High — inspect full assembly |
Why Timely Sway Bar Link Replacement Is Critical
A worn link rarely fixes itself, and the longer it stays in service, the more damage it spreads to surrounding parts. There is also a compliance angle that fleet managers cannot ignore.
Addressing the link promptly protects the sway bar, the bushings, and — ultimately — your inspection record. Timely repair is cheaper than the chain of failures that follows neglect.
DOT Inspection and Compliance Considerations
Worn or broken suspension components factor into roadworthiness under standard commercial vehicle inspection practice. A dangling or clearly failed link can contribute to an out-of-service determination during a roadside or CVSA-style inspection.
Even when a worn link is not an automatic out-of-service item, it signals deferred maintenance to an inspector. That impression alone often invites a deeper look at the rest of the front end.
“On heavy chassis, roll control is a safety system, not a comfort feature. A neglected stabilizer link doesn’t just make noise — it quietly erodes the truck’s handling margin when it’s fully loaded.” — a common view among experienced fleet suspension technicians.
Cost of Delay: Cascading Suspension Damage
When a link develops play, the sway bar starts hammering its bushings and brackets. That accelerated wear can turn a straightforward link job into a bushing, bracket, and bar replacement.
The cost framing here is qualitative but real: a small, inexpensive part left in service can multiply your labor and parts bill several times over. Fixing the link early is almost always the economical move.
Tools, Parts, and Safety Preparation
Good preparation is what separates a clean 45-minute job from a frustrating afternoon fighting seized hardware. Gather everything before you lift the truck.
Required Tools and Equipment
- Calibrated torque wrench (critical for final tightening).
- Breaker bar and a good socket/wrench set.
- Penetrating oil for corroded fasteners.
- Ball-joint separator or pickle fork.
- Air impact wrench to speed removal.
- Oxy-acetylene torch or induction heater for seized hardware.
- Cutting tools (angle grinder / reciprocating saw) as a last resort.
- PPE: safety glasses, gloves, and hearing protection.
The specialty items matter most. On a rust-belt tractor, a spinning ball stud and a rusted-solid nut are the norm, so having a way to hold, heat, or cut the fastener saves real time.
Choosing the Right Replacement Link (OEM vs. Aftermarket)
For industry pros, selection comes down to load rating, joint design, and material quality. The replacement should match or exceed the original spec — never downgrade on a heavy chassis.
Greaseable designs are worth prioritizing on vocational trucks because they let you flush contaminants during routine PM. If you are sourcing links across a mixed fleet, review the options on a specialist supplier’s product system pages to match components by application, and cross-check compatibility against a supported brand catalog.
| Option | Pros | Cons |
|---|---|---|
| OEM link | Guaranteed fitment, matched load rating, warranty backing | Longer lead times on some models; limited to sealed designs on certain platforms |
| Quality aftermarket | Wide availability, often greaseable, competitive value | Quality varies by brand; verify load rating before buying |
| Heavy-duty upgrade | Stronger studs and boots, longer service life in severe duty | May require verifying clearance; premium sourcing |
Pre-Job Safety Checklist
- Park on level, solid ground — never on gravel or a slope.
- Chock the wheels that stay on the ground.
- Set the parking brake and confirm the transmission is secured.
- Use jack stands rated for the chassis weight, not just the axle.
- Confirm the truck is stable before any body goes underneath.
Heavy chassis are unforgiving. A stand rated for a light-duty vehicle has no place under a Class 8 tractor, so verify the rating stamped on your equipment.
How to Replace a Stabilizer Bar Link: Step-by-Step
This is the core of the job. The sequence below applies to most heavy-duty applications, though bracket orientation and fastener style vary by make. Always confirm details against the specific truck’s service literature.
Step 1: Safely Lift and Secure the Truck
Lift the front end with a jack rated for the load and transfer the weight onto properly rated stands. On many heavy chassis you’ll leave the axle at ride height or slightly loaded so the link isn’t fighting suspension tension during removal.
Double-check stability by rocking the chassis before you commit. This is the single most important safety step in the entire procedure.
Step 2: Locate and Inspect the Old Link
Trace the sway bar from one end to the other and find both links. Confirm which one is failed by shaking it and checking the boots — sometimes the noisy side isn’t the only worn side.
While you’re there, inspect the bushings and brackets. If they’re hammered out, plan to address them in the same visit rather than doing the job twice.
Step 3: Stabilizer Link Removal on Semi Trucks
Now for the part every tech dreads. On a clean truck, removal is two fasteners. On a corroded one, it’s a battle.
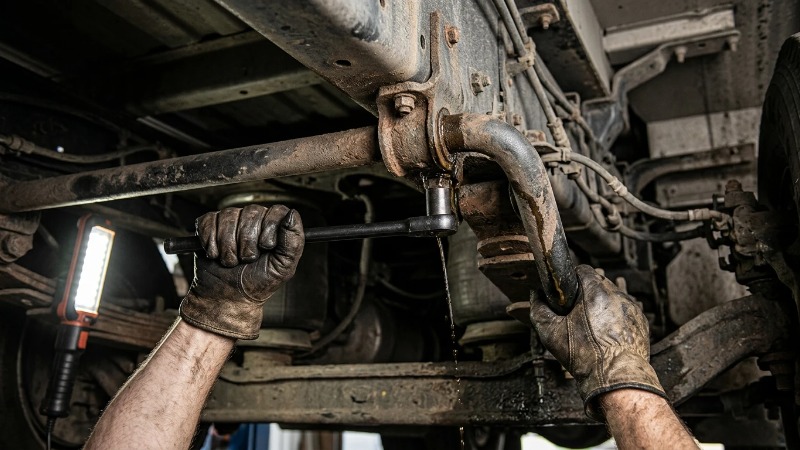
Start by soaking the fasteners with penetrating oil. Many technicians find that letting the oil dwell — sometimes for hours or overnight — dramatically improves the odds of clean removal during stabilizer bar link removal semi truck work.
The classic problem is a spinning ball stud: the whole stud rotates instead of the nut. Grip the stud with vise grips, or use a torch to break the rust bond, or in stubborn cases cut the fastener and replace the hardware.
Handling Corroded or Seized Fasteners
Give penetrating oil real dwell time before reaching for heat. When you do apply a torch, protect nearby brake lines, air lines, ABS wiring, and rubber components — a stray flame here creates a much bigger repair.
If the joint is fully seized, cutting is often faster and safer than fighting it. Plan to replace all hardware you cut; reusing damaged studs or nuts undermines the entire repair. For torch-heavy or press-heavy scenarios, our technical support resources can help you plan the safest approach.
Step 4: Sway Bar End Link Installation
With the old link out, clean the mounting surfaces and check the bracket holes for elongation. Fresh hardware seats better against clean metal.
Orient the new link correctly — some designs are directional, and reversing them causes clearance or bind issues. Follow a proper sway bar end link installation guide for the specific platform, and hand-thread every fastener first to avoid cross-threading.
Bring the link up in stages. Snug both ends before final torque so the joint aligns naturally instead of being pulled into position under load.
Step 5: Applying Correct Torque Specifications for Sway Bar Links
Torque is where good intentions fail. Under-torque and the link works loose within weeks; over-torque and you crack the boot, deform the stud, or strip threads.
The correct torque specifications for sway bar links depend on the make, model, and fastener size. The only reliable source is the OEM service manual for that specific truck — do not rely on generic values.
| Truck Class / Application | Typical Fastener Type | Torque Value |
|---|---|---|
| Class 7 medium-duty | Ball-stud nut | Consult OEM manual |
| Class 8 tractor | Ball-stud / thru-bolt | Consult OEM manual |
| Vocational / off-road | Heavy-duty stud | Consult OEM manual |
We deliberately do not publish a universal number here. Publishing a wrong torque figure would be worse than no figure at all, so always verify against the manufacturer’s documentation before your final pull.
Step 6: Final Inspection and Road Test
Once torqued, check clearance through the full suspension travel — cycle it if you can, and confirm the link doesn’t contact the frame, tire, or air lines.
Lower the truck, let it settle at ride height, and plan a re-torque after a short shakedown. Then road test over the same surfaces that produced the original noise to confirm the fix.
Common Mistakes to Avoid
Most link comebacks trace to a handful of predictable errors. Avoid these and your repair holds.
Torquing Without a Manufacturer Spec
Eyeballing torque is the number-one cause of repeat failures. A calibrated torque wrench and the correct spec are non-negotiable on load-bearing suspension hardware.
Reusing Worn Hardware or Boots
If you cut or heat a fastener, replace it. A stretched stud or nicked boot will fail early and can take the new joint with it.
Ignoring the Opposite-Side Link
Links wear as a set because they share the same duty cycle. If one side is done, the other is usually close behind — replacing both while the truck is already lifted saves a second round of labor.
Skipping the Post-Install Re-Torque
Fasteners settle after the suspension cycles a few times. A quick re-torque after the shakedown drive prevents the slow loosening that produces a fresh clunk a week later.
Mismatching Link Length or Load Rating
An incorrect length preloads the bar or lets it flop; an under-rated link fails under load. Match the part to the application, not just to what fits the bracket.
When to DIY vs. Call a Professional
This job is well within reach of a competent fleet shop, but it isn’t always the right call. Being honest about your bay’s capability protects both the truck and your liability exposure.
| In-House / DIY | Professional Shop |
|---|---|
| Lower direct cost when tooling already exists | Right tooling on hand for seized/pressed hardware |
| Full control over parts and timing | Warranty coverage on parts and labor |
| Requires calibrated torque and lift capacity | Handles alignment checks and adjacent repairs |
| Liability sits with your shop | Documented repair for compliance records |
Skill and Equipment Threshold
A capable fleet shop with a proper lift, heat source, and calibrated torque tools can handle most link jobs in-house. The decision to outsource usually hinges on seized-fastener risk near brake and air lines, or on the need for post-repair alignment verification.
When the surrounding components are worn — bushings, brackets, or the bar itself — a shop with press capability and broad parts access is the safer bet. If you’re weighing that call, our team is available to advise, and you can review real fleet case studies to see how similar repairs were scoped.
Maintenance Tips to Extend Link Life
The best link failure is the one you prevent. A little routine attention dramatically stretches service life, especially on vocational trucks.
Greasing Intervals for Greaseable Links
Greaseable links let you purge contaminants and keep the joint packed. Fold the grease step into your existing chassis lube routine so it never gets skipped, and grease until fresh product pushes past the boot without over-pressurizing it.
Inspection Cadence in Preventive Maintenance Schedules
Tie link inspection to your standard PM cycle — a quick shake test and boot check during every service interval catches problems early. Fleets running severe duty should inspect more often, since grit and articulation accelerate wear.
Documenting these checks also strengthens your maintenance record for compliance. Consistent PM is the cheapest form of heavy duty truck suspension repair there is — you can structure it around the guidance in our support library, and learn more about our approach on our company page.
Frequently Asked Questions
How long does it take to replace a stabilizer bar link on a heavy duty truck?
On a clean chassis, expect roughly 45 minutes to an hour per side. Corroded or seized fasteners can push that to two hours or more, especially if heat or cutting is required.
Should I replace both sway bar links at the same time?
Generally yes. Both links share the same duty cycle, so when one wears out the other is usually close behind — replacing them as a pair saves a second round of labor and keeps roll control balanced.
Can I drive with a broken stabilizer bar link?
You should not operate a loaded truck with a fully broken link. Roll control is compromised, handling becomes unpredictable in corners, and it can contribute to an out-of-service finding during inspection. Repair it before returning the truck to duty.
What torque should I use on a sway bar end link?
Always use the value in the OEM service manual for that specific truck. Torque varies by make, model, and fastener size, so a generic number can do real harm — verify the spec before your final pull .
How much does stabilizer bar link replacement cost for commercial trucks?
Cost depends heavily on parts grade, labor rates, and whether fasteners are seized. It’s typically a modest repair when done proactively, but neglect that spreads to bushings and the bar itself can multiply the bill. For an application-specific estimate, contact a heavy-duty suspension shop.
How often do heavy duty truck sway bar links fail?
There’s no fixed interval — failure tracks duty cycle and terrain more than mileage. Trucks running severe off-road or vocational routes wear links faster than long-haul highway units, which is why inspection cadence should match the application.
Conclusion and Next Steps
Replacing a stabilizer bar link is a routine job with real safety weight behind it. Nail the fundamentals — safe lifting, clean removal, correct orientation, and manufacturer torque — and you’ll deliver a rattle-free repair that holds up under load.
Remember the two habits that prevent most comebacks: replace links in pairs, and re-torque after the shakedown drive. Discipline on those points protects your inspection record and your driver’s confidence in the truck.
Call to Action
Ready to keep your fleet’s front end tight and compliant? Explore the right components on our suspension system catalog, browse supported brands, or reach out to our team to book a heavy-duty suspension inspection. For deeper technical resources, start at our homepage and dig into the technical support center.
Meta description: Step-by-step guide to heavy duty truck stabilizer bar link replacement.


