Introduction
Heavy-duty truck diesel engines run under harsh, high-stress conditions every single day. For instance, long highway hauls, full-load cargo weight, steep mountain climbs, and extreme seasonal temperatures continuously pressure core engine components. Among these critical parts, the cylinder sleeve, also referred to as the cylinder liner, plays one of the most vital roles in engine stability and durability.
Basically, the cylinder sleeve creates a stable cavity for piston movement and fuel combustion. It also holds consistent combustion pressure to sustain steady power output. Even minor, unnoticed sleeve wear can slowly reduce engine performance, fuel efficiency, and long-term reliability over thousands of miles.
In most fleet maintenance routines, technicians prioritize filters, brake components, and turbo systems. However, cylinder sleeve inspections are frequently overlooked. In fact, sleeve damage progresses silently in early stages. There are no warning lights, error codes, or loud noises to alert drivers
As a result, by the time visible symptoms appear, most sleeve damage has already become irreversible. Moreover, repeated engine failures often occur because repairs only address surface symptoms rather than fundamental root causes. Therefore, understanding cylinder sleeve faults, inspection standards, and correct replacement practices is essential for lowering fleet operating costs
This detailed guide covers all common cylinder sleeve failure types, accurate symptom identification, root causes, professional inspection procedures, targeted repairs, and long-term maintenance advice. Furthermore, it applies to all mainstream heavy-duty truck engines, including Cummins, Detroit, Caterpillar, Weichai, and Sinotruk. To maintain balanced vehicle performance, always pair premium cylinder sleeves with durable truck chassis system for stable
Dry vs Wet Cylinder Sleeve: Key Structural Differences
Before diagnosing faults or performing replacements, it is necessary to understand the two primary cylinder sleeve designs. In general, heavy-duty diesel engines use either dry cylinder sleeves or wet cylinder sleeves. Importantly, their structural differences create unique working behaviors, failure patterns, and
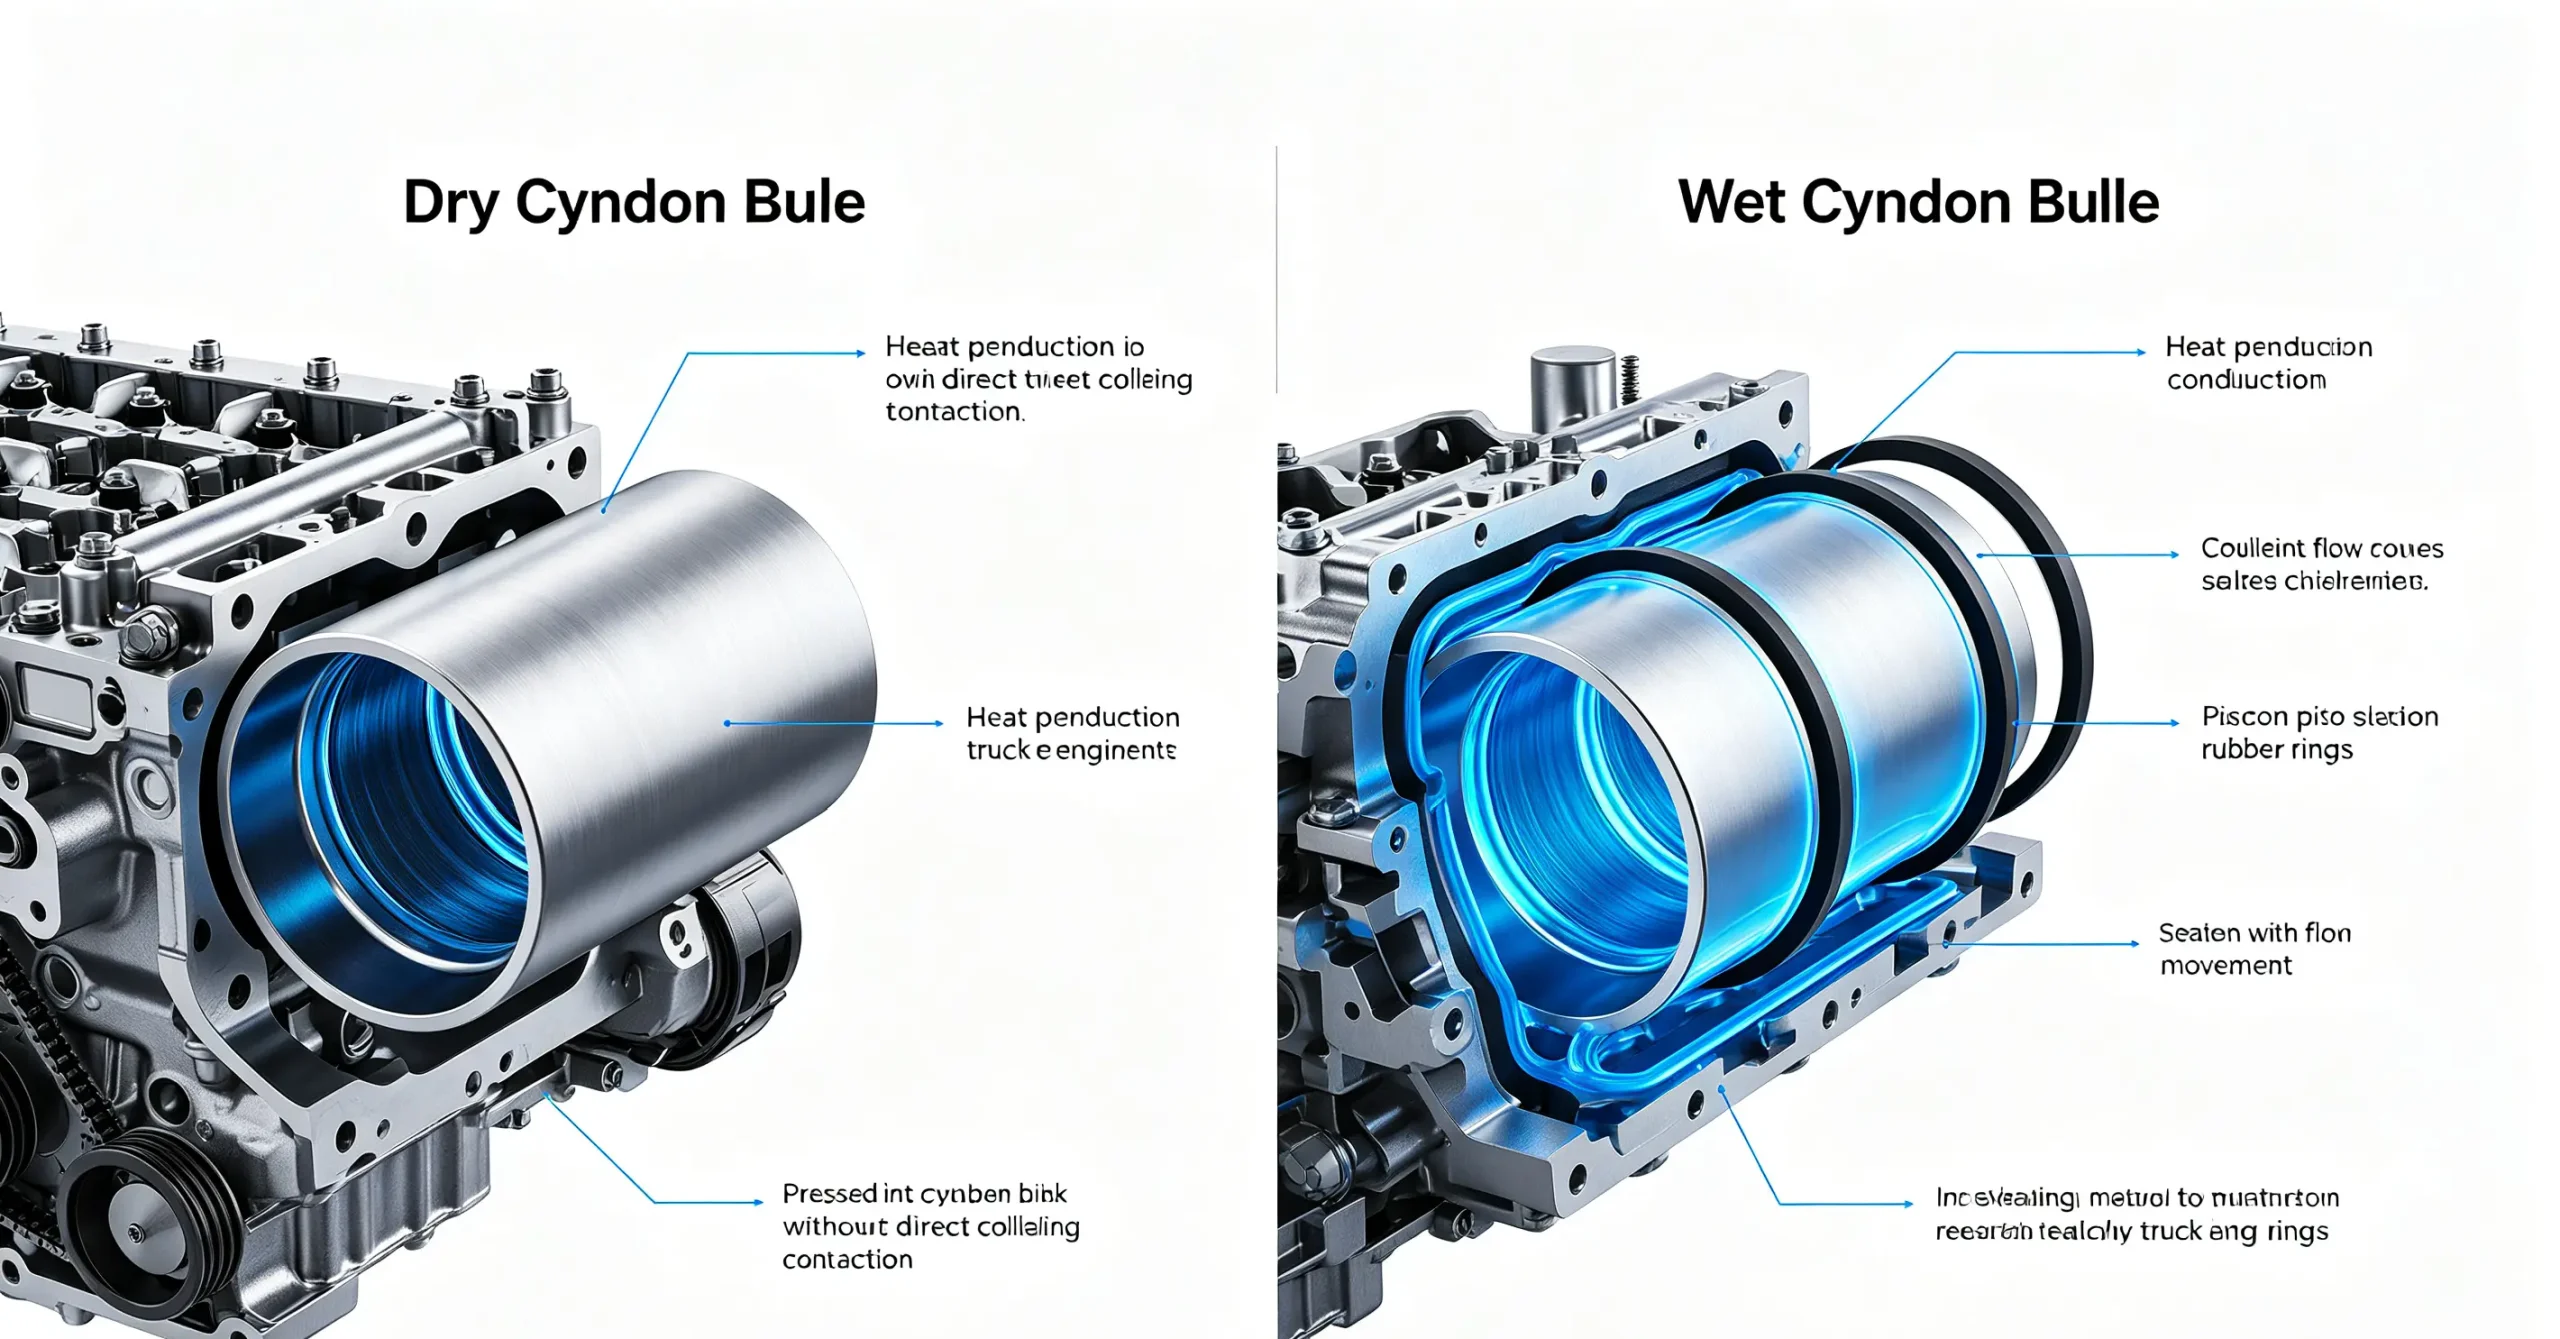
Dry Cylinder Sle: Dry sleeves are commonly installed on Cummins and Detroit high-power diesel engines. Unlike wet sleeves, dry sleeves do not make direct contact with engine coolant. Instead, heat dissipation fully depends on thermal conduction through the cylinder block. For this reason, dry sleeves offer high rigidity and minimal thermal deformation, delivering stable performance during
On the downside, dry sleeves struggle under continuous harsh operation. Specifically, long-term overloading easily creates localized overheating. In addition, sustained high temperatures accelerate carbon buildup and inner wall abrasion, gradually shortening the usable service life of the
Wet Cylinder: Wet sleeves serve as the standard configuration for Weichai, Sinotruk, and Caterpillar heavy-duty engines. Their outer surfaces are fully submerged in coolant. Accordingly, wet sleeves provide fast, efficient heat exchange and perform reliably under heavy loads and
Nevertheless, wet sleeves rely entirely on rubber sealing rings for isolation and positioning. For this reason, seal aging, persistent engine vibration, and long-term coolant exposure are the top causes of wet sleeve failure. Statistically, wet cylinder sleeve issues account for over 70% of all sleeve-related fleet
Additionally, cylinder sleeve problems differ truck cylinder head failures. To elaborate, cylinder head faults usually stem from gasket deterioration and thermal fatigue. On the contrary, cylinder sleeve failures result from mechanical friction, structural distortion, and long-term material fatigue. Thus, they require separate diagnostic and repair workflows.
8 Common Truck Cylinder Sleeve Failure Types
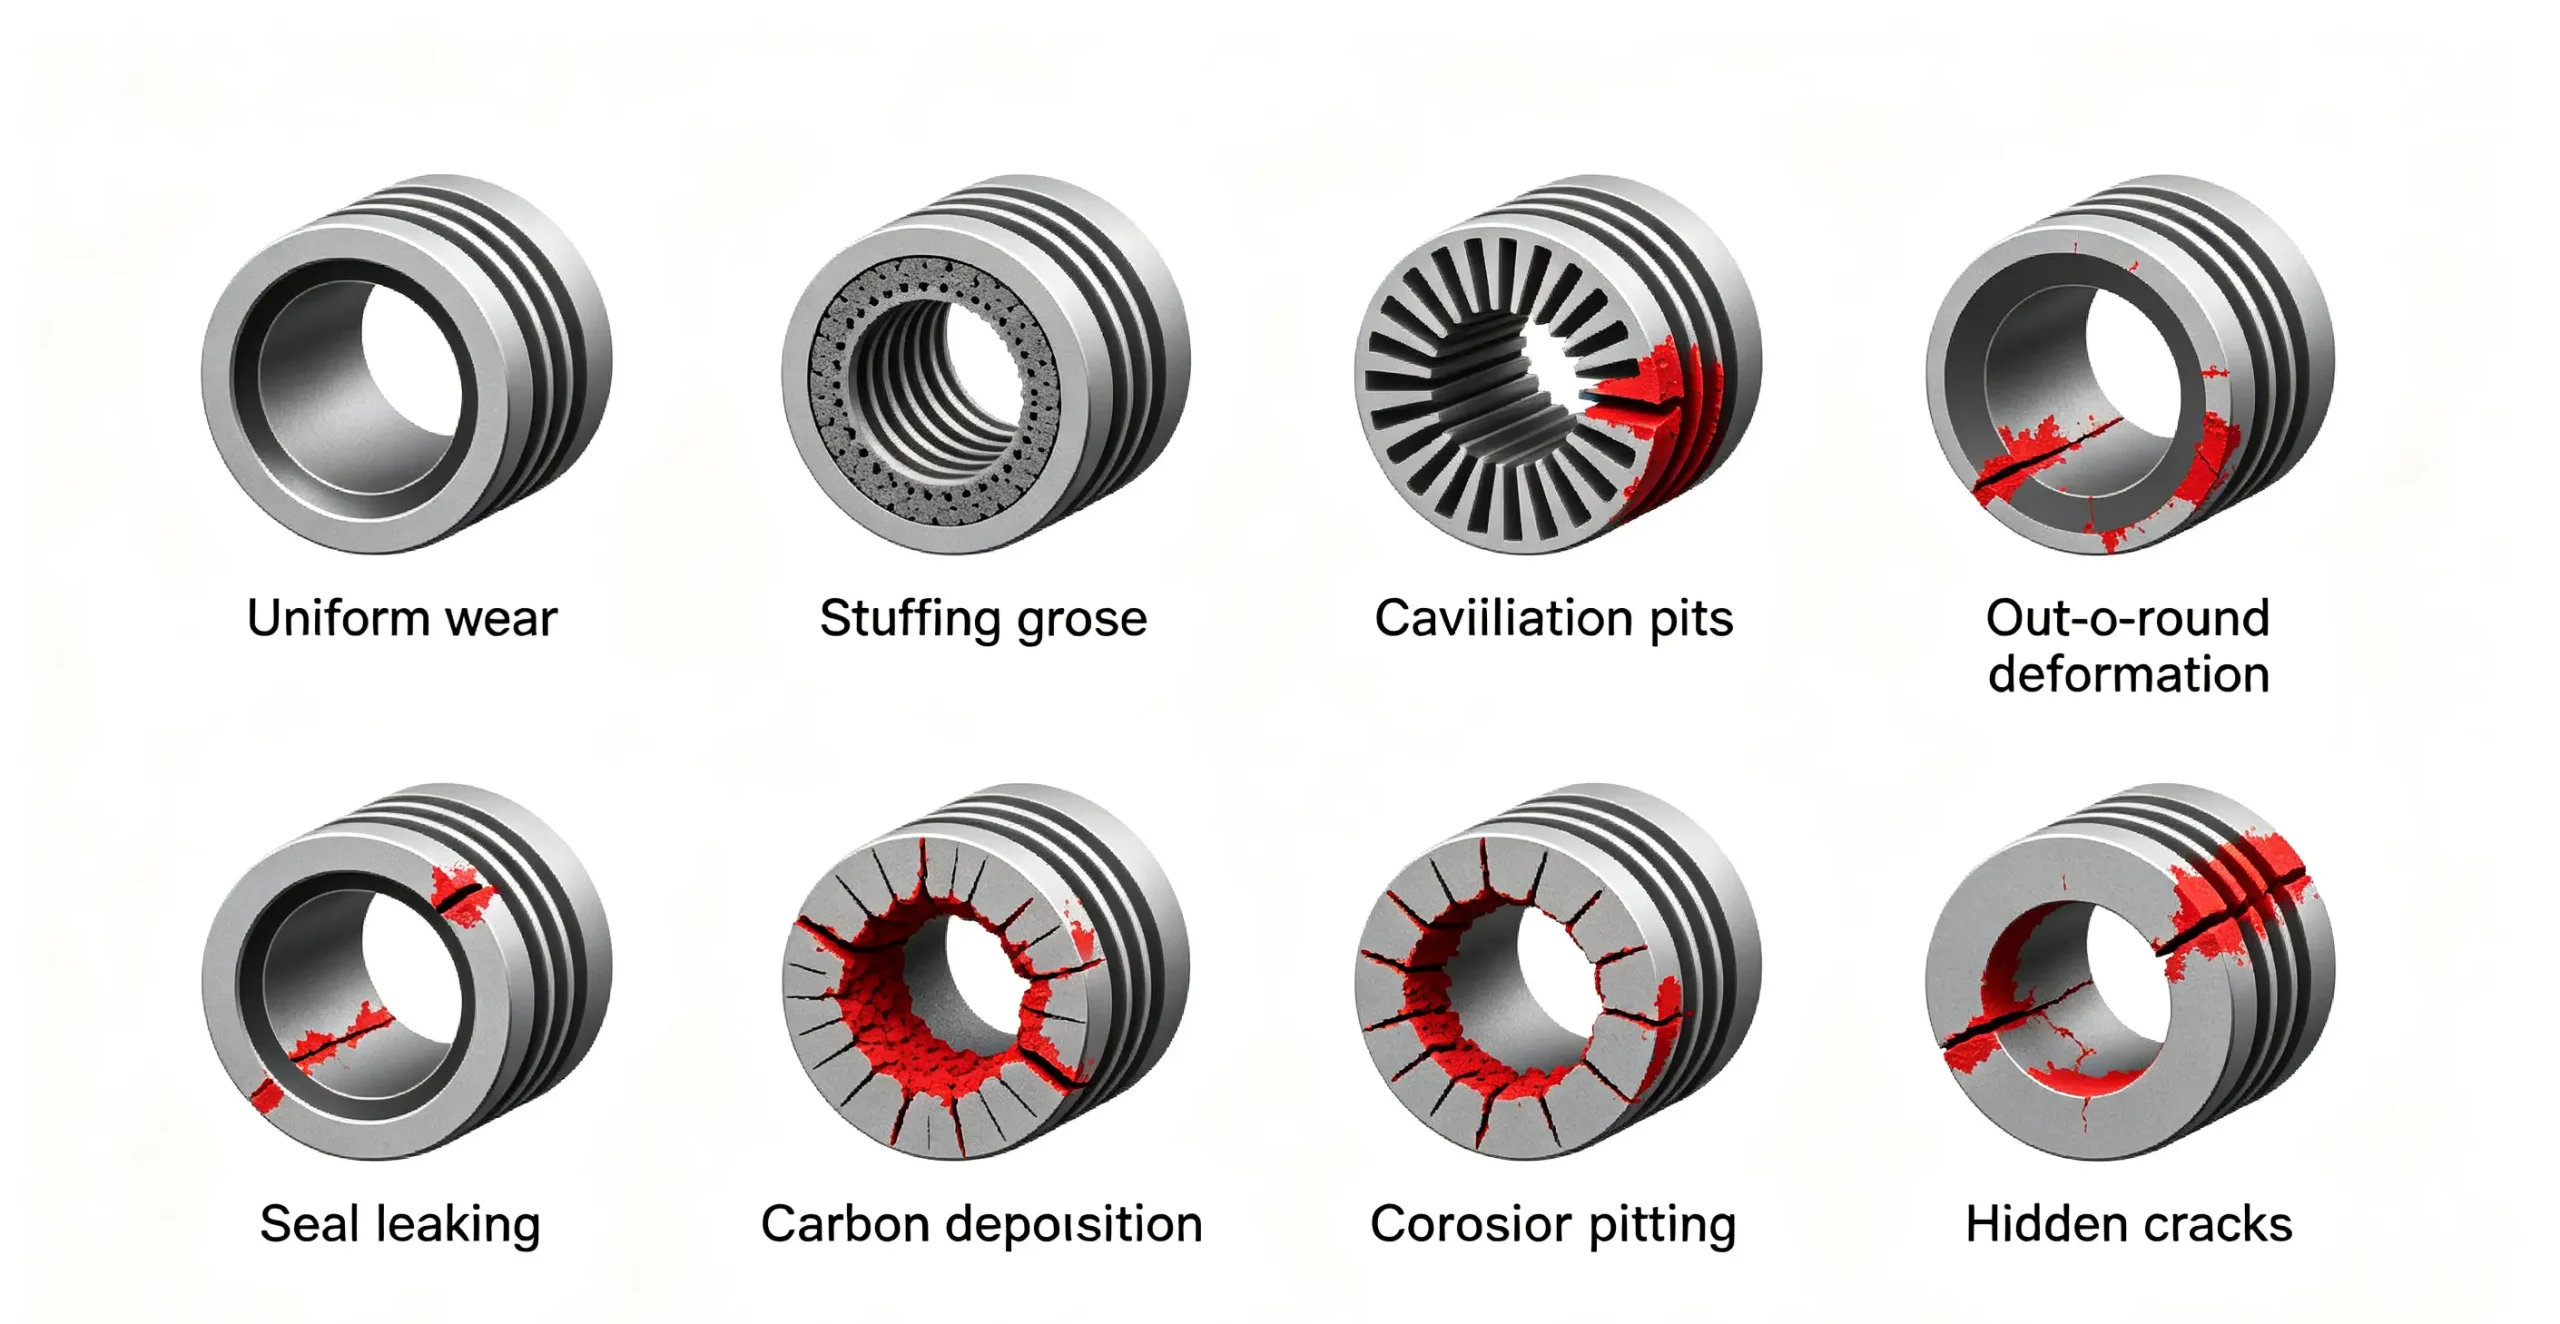
According to long-term fleet maintenance data, premature cylinder sleeve damage falls into eight typical categories. Each failure type features distinct symptoms and formation processes. Therefore, accurate symptom recognition helps technicians avoid unnecessary replacements and reduce
1. Natural Uniform
Uniform inner wall wear is a natural aging process after high-mileage operation. Generally, after 300,000 to 500,000 miles of steady driving, even high-quality sleeves develop fine vertical friction marks on the inner surface.
In early stages, this wear barely impacts engine performance. As clearance gradually increases, however, drivers begin to notice subtle changes. These changes include slightly higher oil consumption, reduced power response, and unstable idle operation.
In advanced stages, excessive uniform wear leads to obvious oil burning and increased crankcase blow-by gas. Without timely maintenance, this issue eventually causes power loss and poor combustion efficiency
2. Cylinder Scuffing & Groove Damage
Cylinder scuffing is an abrupt, destructive mechanical fault. It occurs when the engine’s protective oil film suddenly fails during operation. Once the oil film disappears, the piston makes direct metal-to-metal contact with the
In mild cases, scuffing produces intermittent blue exhaust smoke and noticeable oil consumption increases. In severe cases, it triggers engine shaking, loud cylinder block friction noise, and even unexpected engine stalling while driving.
Furthermore, scuffing damage typically concentrates on individual cylinders. It accelerates piston ring wear and destroys the precise clearance balance of the entire
3. Wet Sleeve Cav
Cavitation erosion is a failure exclusive to wet cylinder sleeves. During engine operation, rapid piston movement creates minor continuous sleeve vibration. Meanwhile, internal coolant pressure fluctuates rapidly
As a result, countless microscopic vacuum bubbles form on the sleeve’s outer wall. When these bubbles violently collapse, they generate strong impact pressure. Over time, repeated impacts create tiny pits across the metal surface.
Notably, cavitation shows no obvious warning signs in early phases. As damage accumulates, however, it causes gradual coolant loss, milky emulsified engine oil, white startup smoke, and weak engine power output.
4. Thermal Deformation & Out-of-Round Bore
Heavy-duty truck engines endure repeated extreme temperature cycling during daily operation. Continuous high-load running causes thermal expansion, while sudden cooling creates rapid contraction.
Gradually, this inconsistent temperature stress causes the cylinder sleeve to lose its perfect circular shape and develop tapered deformation. In turn, structural distortion breaks the precise piston-to-sleeve fit.
Common symptoms include rough idle, delayed acceleration response, and increased exhaust emissions. In many cases, technicians misdiagnose this issue as simple piston ring wear, which delays proper
5. Seal Ring Failure & Coolant Leak
Rubber seal rings are critical wearable components for wet cylinder sleeves. Their primary function is isolating coolant and engine oil. Once seals age, crack, or shift out of position, coolant seeps into the crankcase
Correspondingly, clear warning signs include steadily dropping coolant levels, foamy milky engine oil, and prominent white smoke during engine startup and acceleration
If left unaddressed, prolonged coolant leakage disrupts normal combustion. Worse still, it can trigger severe, permanent structural damage throughout the entire engine system.
6. Carbon Deposition Induced Local Wear
Low-grade diesel fuel, faulty fuel injector atomization, and extended low-load idling generate thick, hardened carbon deposits on piston tops and upper sleeve walls.
During piston reciprocation, these rigid carbon particles act like abrasives. They gradually wear down the upper sleeve section and create uneven stepped wear patterns.
As a result, cylinder sealing efficiency drops significantly. Meanwhile, drivers experience black exhaust smoke, sluggish acceleration, and abnormally high
7. Internal Corrosion & Pitting
Diesel combustion naturally produces acidic byproducts. When the engine cools down, water vapor condenses and mixes with acidic residues, forming corrosive liquid that erodes sleeve inner surfaces
Additionally, inferior or mismatched coolant accelerates outer wall corrosion. For this reason, short-haul trucks with frequent start-stop cycles face the highest corrosion risks.
Corrosion creates dense microscopic pits on sleeve surfaces. These pits destroy the protective oil film layer and drastically speed up overall sleeve deterioration.
8. Hidden Cracks From Non-Stand
Most concealed sleeve cracks do not stem from manufacturing defects. Instead, they result from improper overhaul and installation practices.
Excessive pressing force, uneven bolt torque, and leftover debris on mounting surfaces create concentrated mechanical stress on newly installed sleeves. Over time, engine vibration and thermal cycling expand micro cracks.
Eventually, crack expansion leads to coolant seepage, combustion gas channeling, and unstable cylinder pressure. In serious cases, the issue requires full engine disassembly and complete overhaul.
Root Causes of Premature Cylinder Sleeve Damage
To prevent recurring sleeve failures and frequent replacements, fleet maintainers must understand the core sources of premature wear. Overall, all non-natural sleeve damage falls into four
1. Unreasonable Driving & Loading Habits
Long-term overloading ranks as the top cause of early sleeve failure. Excessive cargo weight drastically raises cylinder combustion pressure and operating temperature. This accelerates both thermal deformation and mechanical friction wear
Furthermore, aggressive driving creates irregular piston stress. Frequent rapid acceleration and sudden braking disrupt smooth piston movement. Meanwhile, cold winter startups without proper preheating fail to form a complete oil film, resulting in dry friction and permanent
2. Irregular
Delayed oil changes leave degraded, contaminated engine oil inside the system. Old oil contains metal fragments, soot, and acidic compounds that continuously scratch and erode sleeve inner walls.
In addition, neglected coolant service causes radiator scaling and blocked water channels. This reduces heat dissipation efficiency and triggers localized overheating deformation. Also, uncleaned mounting surfaces and uncalibrated assembly torque create hidden long-term structural risks
3. Inferior Aftermarket Sp
Many fleet owners install low-cost generic sleeves, piston rings, seals, and coolant to cut short-term expenses. However, these unqualified parts feature poor material hardness, low heat resistance, and unstable structural precision
Consequently, inferior components wear and deform rapidly. They create repeated engine issues and ultimately increase long-term fleet downtime and maintenance costs. In contrast, high-quality matched parts greatly extend cylinder assembly service
4. Linked Engine & Chassis System Faults
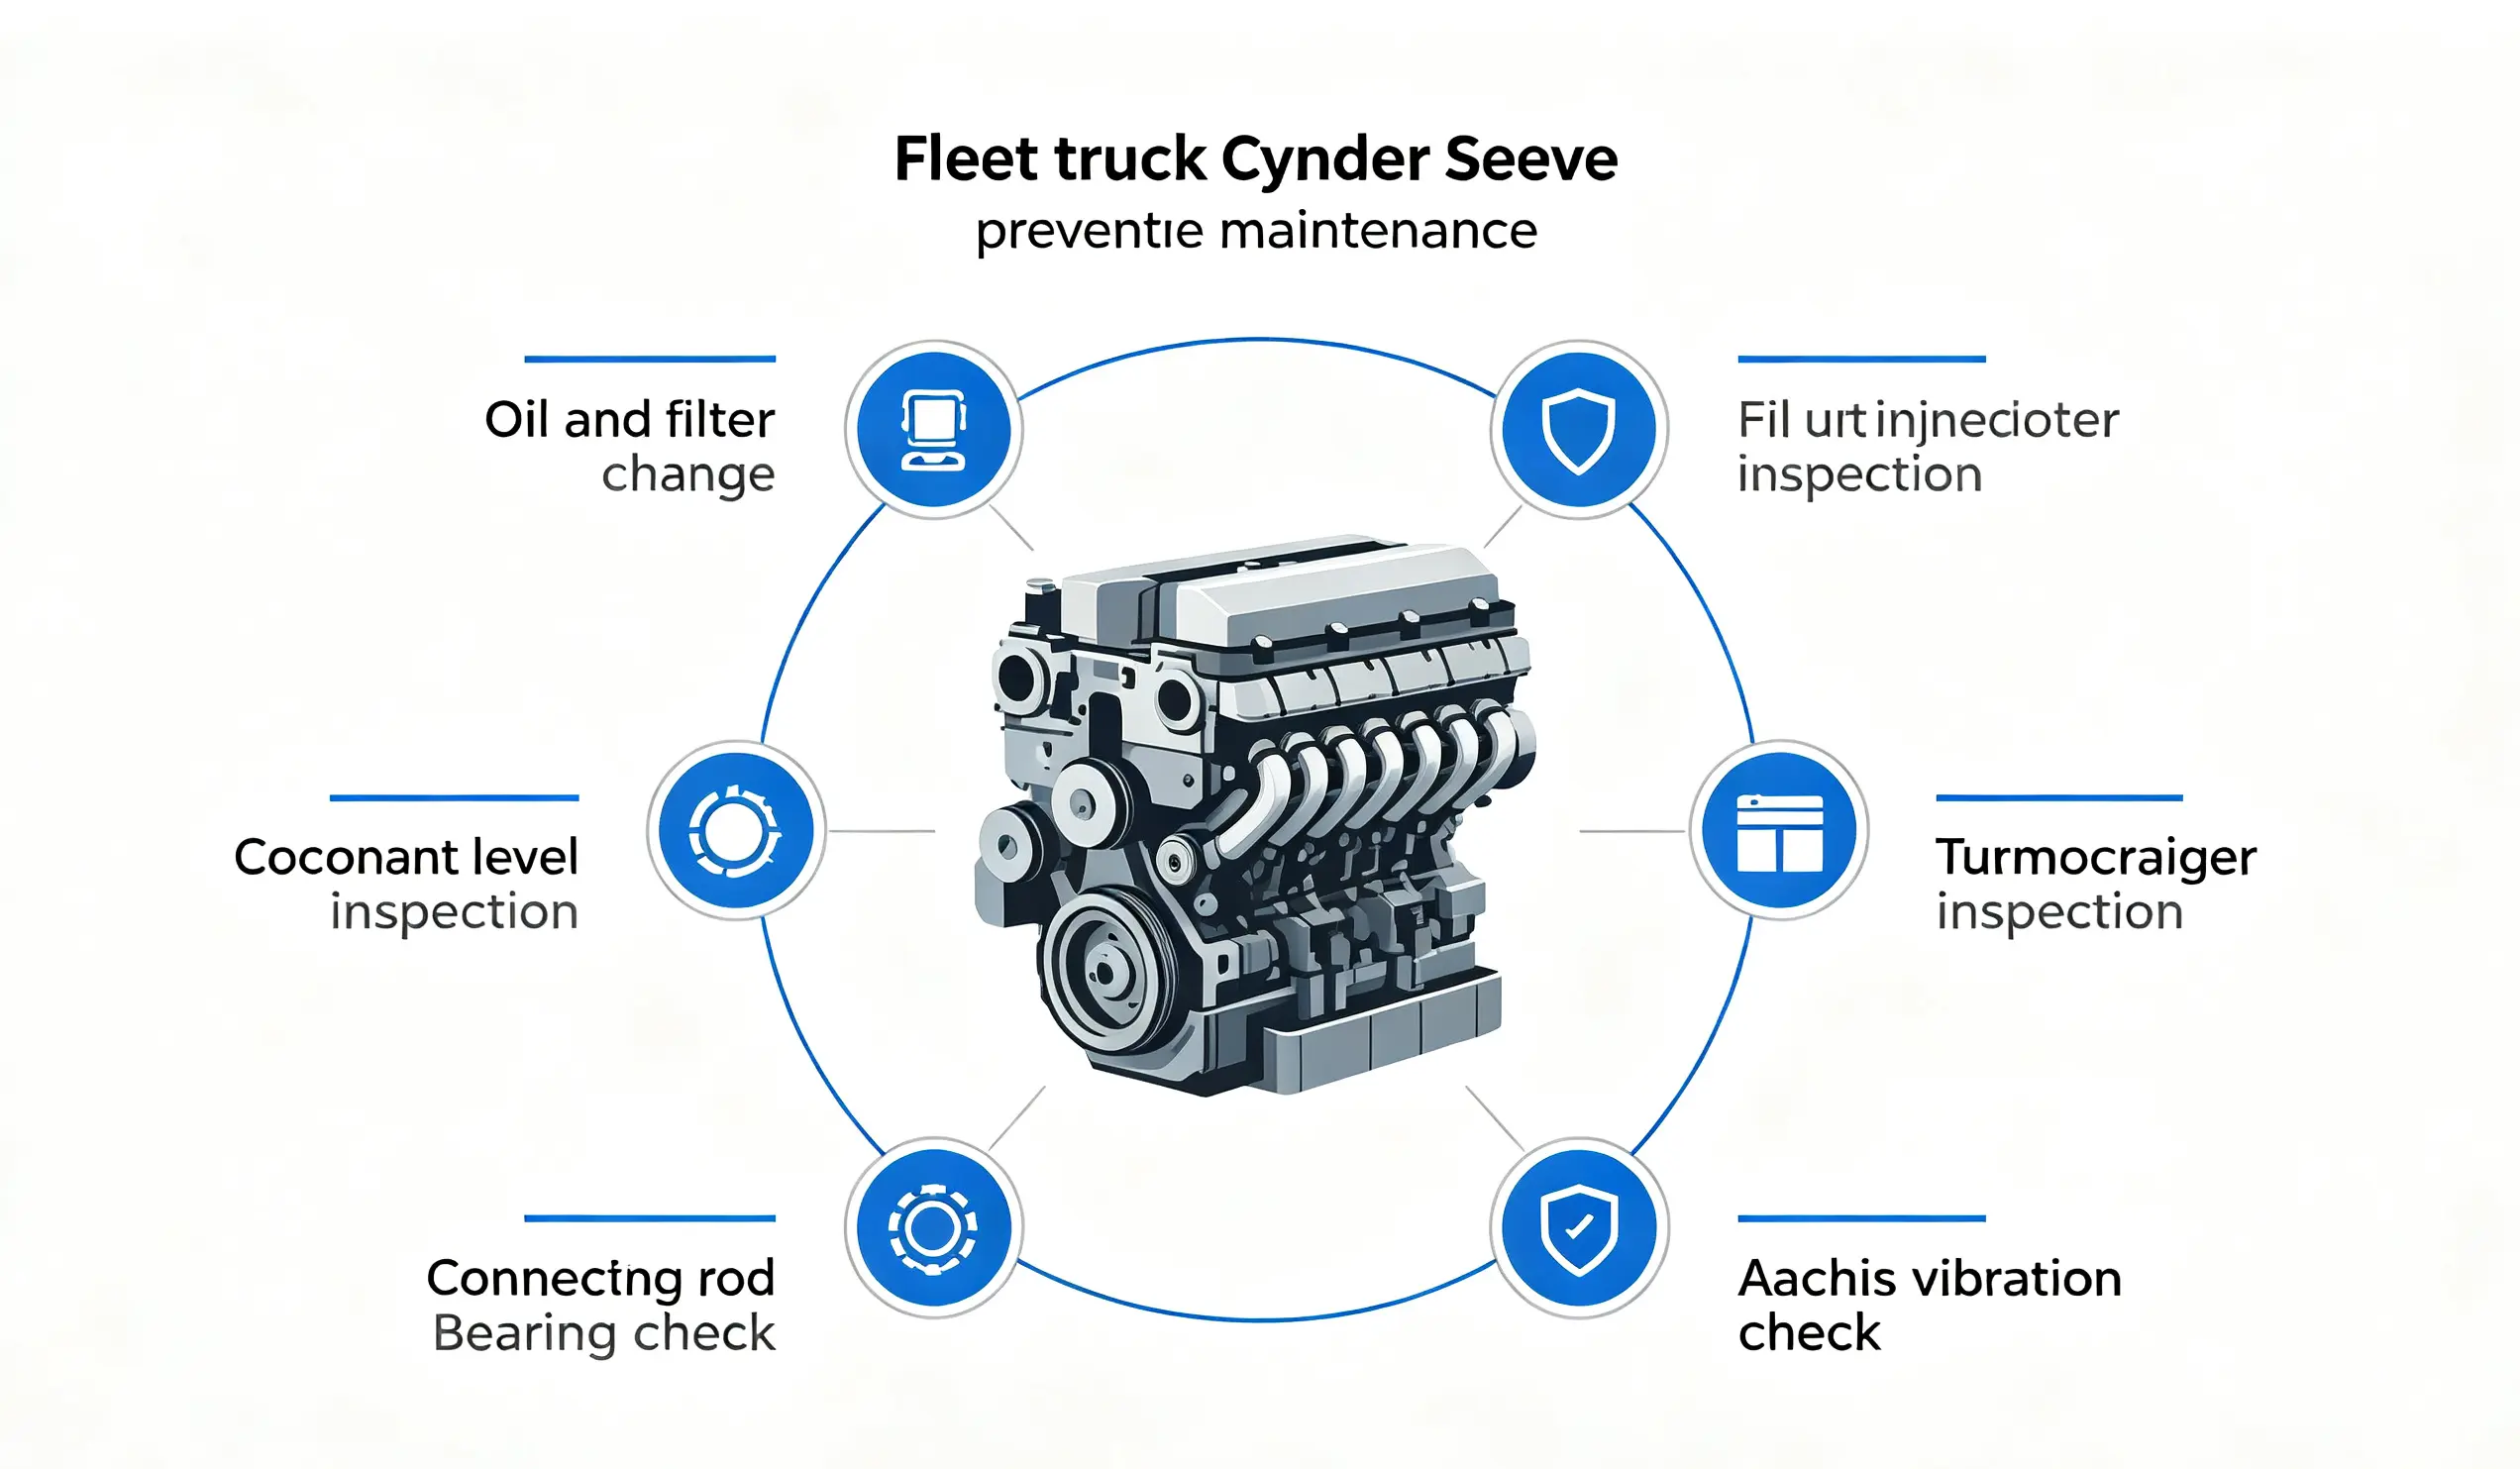
Most sleeve failures are secondary damages caused by other system malfunctions. For example, faulty injectors cause incomplete combustion and heavy carbon buildup. Damaged turbochargers reduce air intake efficiency and
Moreover, worn connecting rod bearings allow piston misalignment. Defective chassis parts generate persistent vehicle vibration that transfers to the engine, worsening sleeve fatigue, cavitation, and crack
Standard Cylinder Sleeve Inspection & Replacement Judgment Standards
Accurate fault assessment is essential for cost-effective repairs. Blind replacement wastes parts and labor resources. Therefore, technicians must follow standardized inspection workflows to decide whether to repair or replace cylinder sleeves.
First, perform pre-disassembly performance testing. Observe exhaust color, idle smoothness, oil consumption rate, and coolant loss volume. Additionally, test individual cylinder pressure with professional tools. Low single-cylinder pressure reliably indicates sleeve sealing failure or excessive wear.
Second, complete post-dis. After removing the cylinder head and piston assemblies, thoroughly examine inner and outer sleeve surfaces. Check for scratches, carbon buildup, corrosion pits, cavitation marks, and micro cracks. Also, inspect wet sleeve seal groove wear and dry sleeve block fitting
Third, take precision. Use dial gauges and micrometers to measure sleeve diameter, circularity deviation, and taper deviation. Replace sleeves if wear clearance exceeds 0.15mm, circularity error exceeds 0.05mm, or taper error exceeds 0.10mm. Replace cavitated sleeves if wall thickness loss surpasses one-fifth of the original thickness.
Fourth, classify faults and confirm. Resolve minor in-tolerance wear with basic maintenance and piston ring replacement. Swap single damaged sleeves for moderate localized damage. Replace full sleeve sets for severe deformation, penetrating cavitation, and structural
Targeted Repair & Cylinder Sleeve Replacement Solutions
Each sleeve failure type requires a customized repair or replacement strategy. Universal replacement cannot eliminate hidden failure risks. The following solutions precisely address all eight common sleeve faults.
For normal: If wear remains within tolerance, replace piston rings, clean combustion carbon, and install fresh engine oil and filters. Also, shorten break-in oil change intervals slightly. If wear exceeds standard limits, replace complete sleeves and piston rings, then calibrate cylinder
For cylinder scuff: Polish sleeve walls to remove shallow scratches for mild scuffing. After polishing, fully clean the entire oil system to eliminate abrasive particles. For deep groove damage, replace the faulty sleeve and piston rings, and inspect connecting rod bearings to rule out piston deflection issues.
For wet: Flush cooling system scale and install high-quality anti-cavitation coolant for minor pitting. Also, optimize coolant circulation to reduce sleeve vibration. For severe penetrating cavitation damage, fully replace wet sleeves and complete
For thermal deformation: Perform professional honing and calibration on slightly distorted sleeves, and upgrade heat-resistant piston rings. Additionally, repair blocked cooling passages to prevent recurring overheating. For severely warped sleeves with irreversible deformation, carry out complete replacement.
For seal: Install new high-temperature resistant seals for simple seal aging, and perform coolant pressure testing after assembly. If seal grooves are worn or deformed, replace sleeves together with sealing components. Furthermore, fully flush emulsified engine oil to restore normal lubrication performance.
For: Thoroughly clean combustion chamber carbon deposits and repair faulty fuel injectors to fix incomplete combustion. Avoid prolonged low-load idling during regular operation. Replace piston rings for mild stepped wear and replace full sleeve assemblies for
For corrosion and p: Flush the entire cooling system to eliminate corrosive residues, and use dedicated heavy-duty anti-corrosion antifreeze. Never mix different coolant types to prevent chemical reactions. Replace sleeves with deep structural pitting to avoid sudden in
For hidden installation cracks: Cracked sleeves have no repair value and require direct replacement. During reinstallation, strictly standardize surface cleaning and assembly procedures. Maintain uniform pressing force and torque, and perform idle running-in plus pressure testing to eliminate residual mechanical stress
Fleet Long-Term Preventive Maintenance
Most premature cylinder sleeve failures are entirely preventable with standardized daily maintenance. In fact, consistent prevention is far more cost-effective than repeated repairs and replacements.
First, establish standardized driving habits. Avoid continuous overloading and aggressive acceleration or braking. In cold winter conditions, preheat the engine for 3 to 5 minutes before heavy-load operation to build a stable protective oil film. Also, reduce frequent start-stop cycles for short-haul routes
Second, follow strict fluid maintenance schedules. Adhere to factory-recommended oil change intervals and use premium-grade diesel engine oil with matching filters. Furthermore, flush cooling system scale every 1 to 2 years and use anti-cavitation antifreeze to protect wet cylinder sleeves.
Third, conduct monthly system inspections. Check fuel injector performance, turbocharger efficiency, and thermostat functionality. Monitor exhaust conditions and crankcase blow-by levels to detect early sleeve wear symptoms. In addition, routinely truck chassis to minimize persistent engine vibration.
Finally, always use qualified OEM or high-quality aftermarket spare parts. Avoid cheap, low-grade sleeves, piston rings, and seals. Precise component matching stabilizes overall vehicle operation and reduces correlated mechanical wear across the engine system.