In the intricate ecosystem of a heavy-duty truck engine, every component plays a vital role in maintaining peak performance and longevity. Among these, the thermostat housing, often overlooked, is a critical guardian of the engine’s thermal regulation. For operators and fleet managers of robust Chinese trucks such as Sinotruk (HOWO), Shacman, FAW (Jiefang), Foton, and Dongfeng, understanding the nuances of the thermostat housing—its function, common problems, and effective repair strategies—is paramount. A malfunctioning thermostat housing can lead to a cascade of issues, from minor coolant leaks to catastrophic engine overheating, directly impacting operational efficiency and incurring significant repair costs. As a dedicated exporter of high-quality heavy-duty truck parts, we aim to equip you with comprehensive knowledge to diagnose, address, and prevent these issues, ensuring your fleet remains reliable and road-ready.
Understanding the Thermostat Housing: More Than Just a Cover
The thermostat housing is a crucial component of a truck’s cooling system, serving as the protective enclosure for the engine thermostat. While the thermostat itself regulates coolant flow, the housing provides the structural integrity and sealing necessary for the system to function effectively. It is typically located at the engine’s coolant outlet, often where the upper radiator hose connects, facilitating the return of coolant to the radiator for cooling.
Function and Importance
The primary functions of the thermostat housing include:
- Securing the Thermostat: It holds the thermostat firmly in place, ensuring it can accurately sense coolant temperature and open/close as required. This precise positioning is vital for the thermostat’s wax pellet to respond correctly to temperature changes.
- Directing Coolant Flow: It acts as a junction, guiding hot coolant from the engine to the radiator and allowing cooled coolant to return. The internal passages are designed to optimize flow dynamics, minimizing turbulence and maximizing heat exchange efficiency.
- Providing Sealing: Along with gaskets or O-rings, it creates a watertight seal to prevent coolant leaks from the engine’s cooling passages. This seal is subjected to constant pressure and temperature fluctuations, making its integrity paramount.
- Mounting Point: It often serves as a mounting point for temperature sensors, which relay critical engine temperature data to the vehicle’s Engine Control Unit (ECU) and dashboard gauge. Accurate sensor placement within the housing ensures precise temperature monitoring.
For heavy-duty trucks, which operate under high thermal and mechanical stresses, the integrity of the thermostat housing is non-negotiable. Its failure can disrupt the delicate balance of engine temperature, leading to severe consequences, including reduced engine lifespan, increased fuel consumption, and potential catastrophic breakdowns. Maintaining this component is an investment in the overall health of your truck’s powertrain.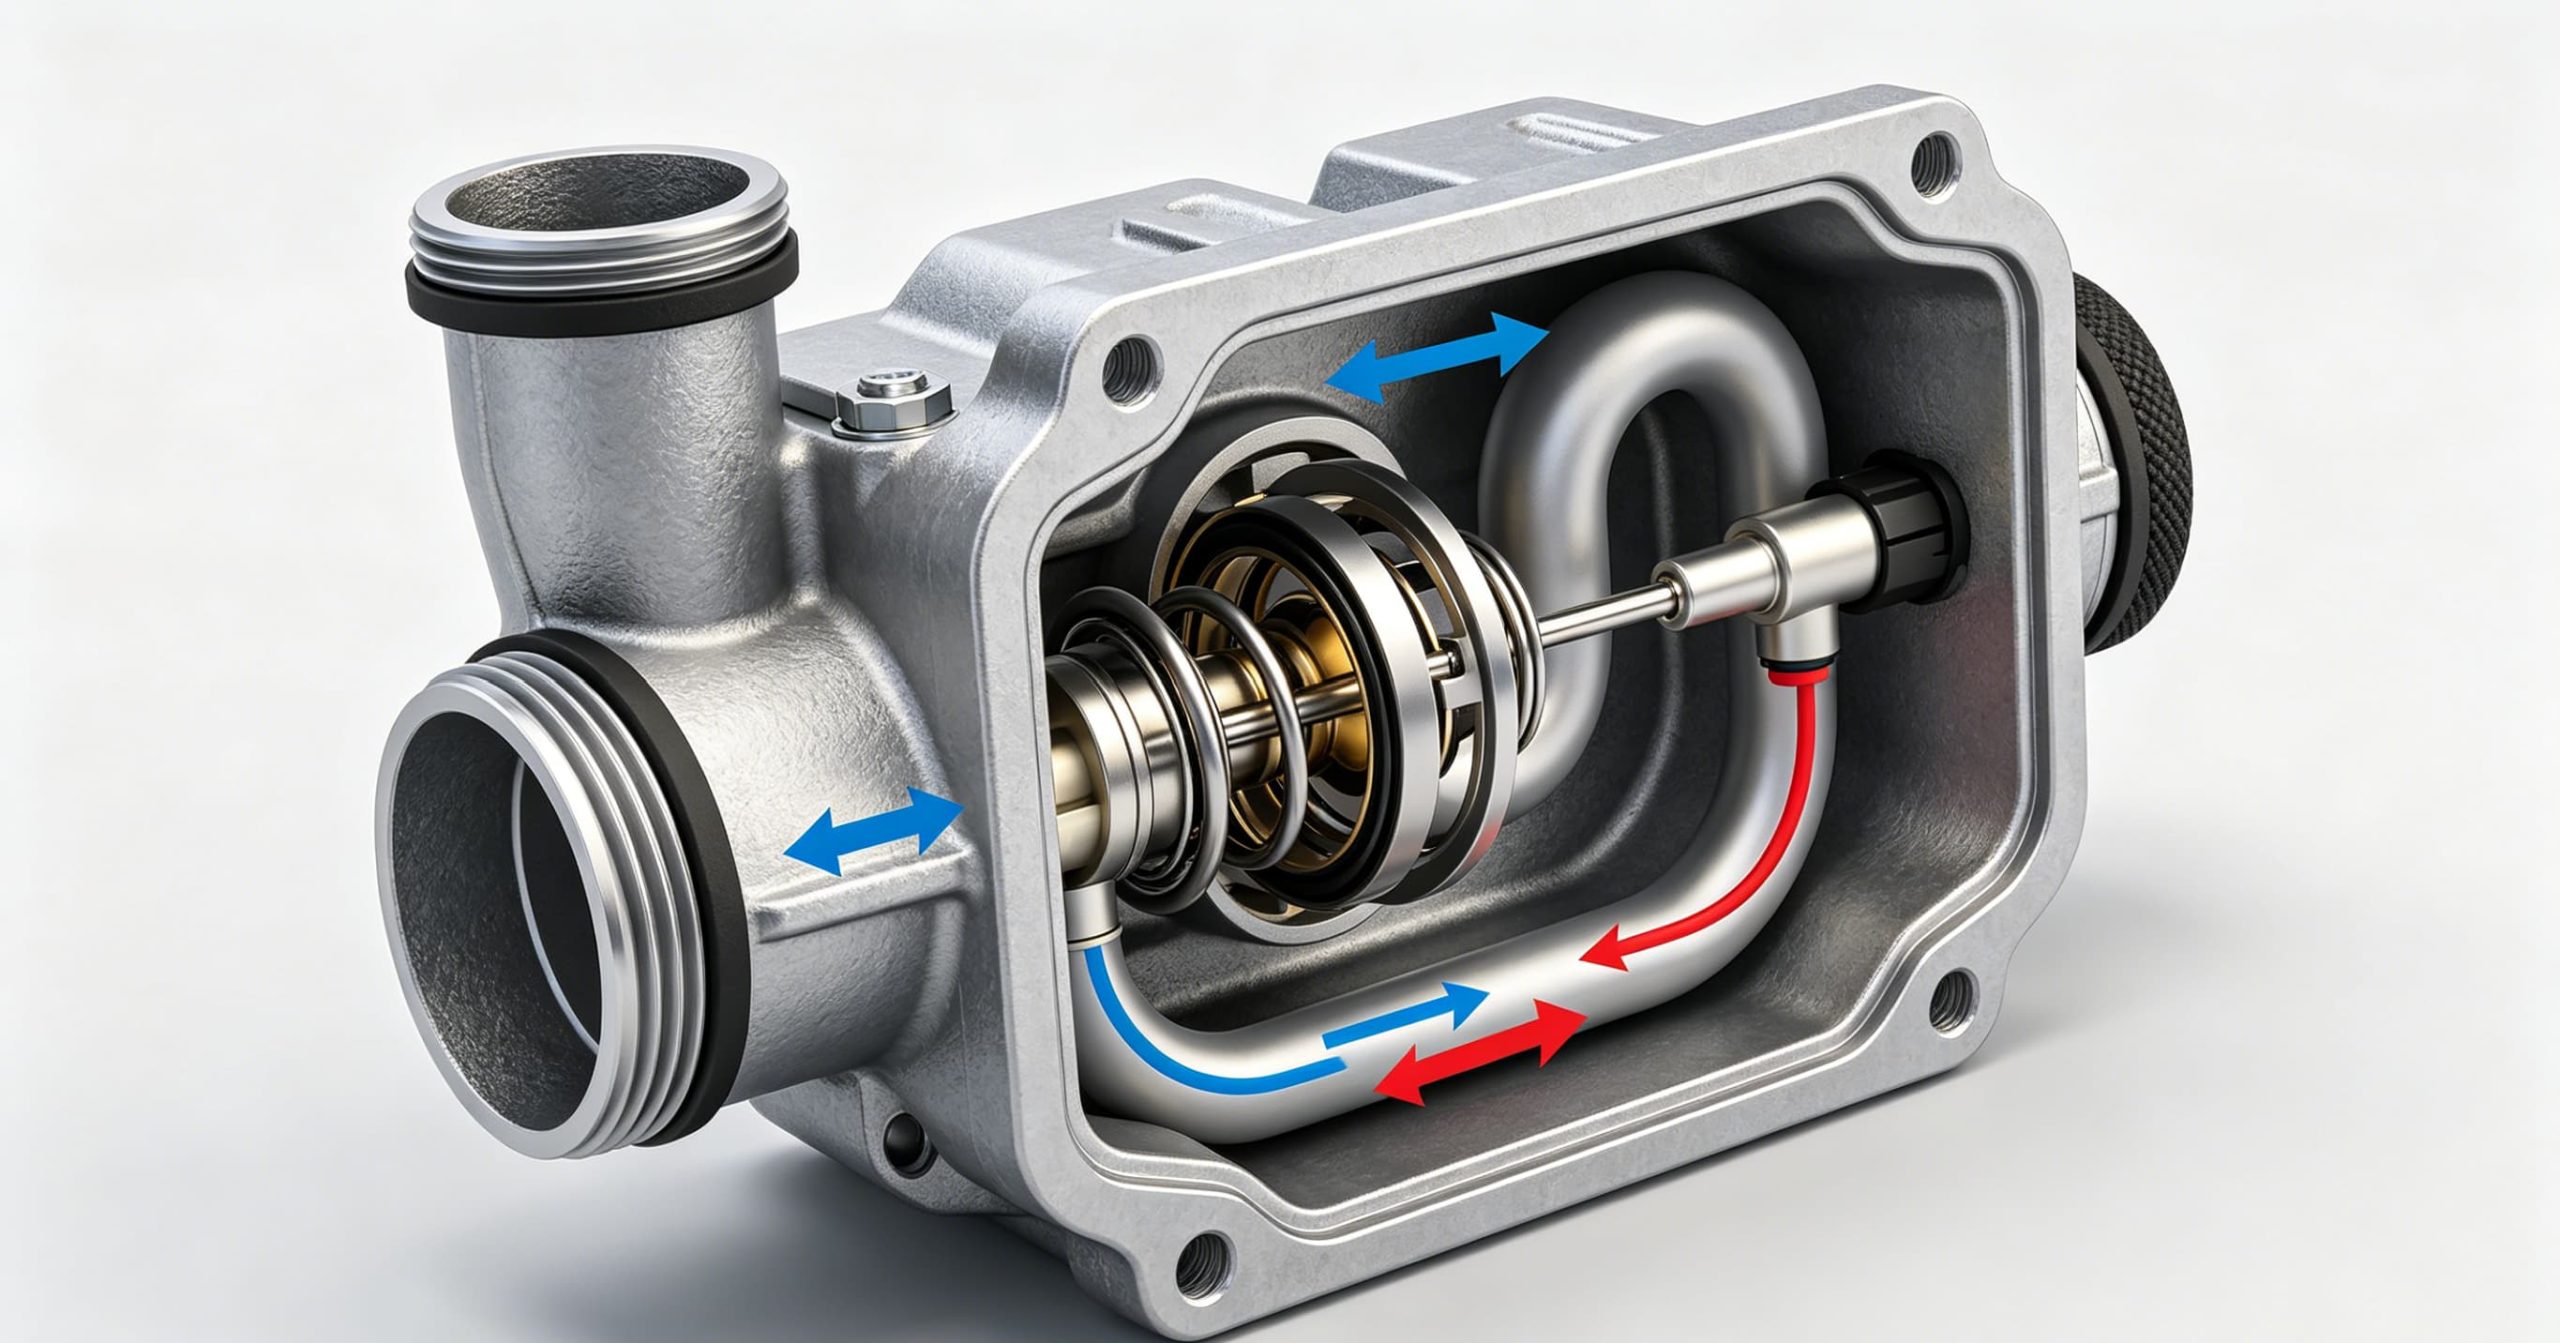
Construction Materials and Design Variations
Thermostat housings are typically manufactured from materials designed to withstand high temperatures, pressure, and corrosive coolants. The choice of material is a critical factor in the housing’s durability and performance:
- Plastic/Composite: Modern trucks often use high-grade plastic or composite materials due to their lightweight nature, corrosion resistance, and cost-effectiveness. These materials are engineered to be robust, but they can become brittle over time due to constant thermal cycling (heating and cooling) and chemical degradation from certain coolant types. This embrittlement often leads to cracking, especially around stress points like bolt holes or hose connections.
- Aluminum: Cast aluminum housings offer superior durability, excellent heat dissipation properties, and are significantly more resistant to thermal fatigue and chemical corrosion than plastic. They are a popular choice for heavy-duty applications, providing a more robust solution. While less prone to cracking, they can still suffer from galvanic corrosion if incompatible metals are present in the cooling system or if coolant maintenance is neglected.
- Cast Iron: Primarily found in older or extremely heavy-duty engines, cast iron housings are exceptionally robust and resistant to physical damage. However, they are heavier and highly susceptible to rust and internal corrosion if the coolant system is not properly maintained with adequate anti-corrosion additives.
Design variations exist, from simple two-piece designs to integrated units that may include multiple coolant passages, sensor ports, bypass valves, and even heater hose connections. Some advanced designs incorporate a bypass passage that allows coolant to circulate within the engine during warm-up, ensuring even heating before the thermostat opens. The complexity of the design often correlates with the engine’s thermal management requirements. The choice of material and design significantly influences the housing’s lifespan and susceptibility to specific problems, making material selection a key consideration for replacement parts, particularly for high-stress applications in Sinotruk (HOWO) and Shacman engines.
Common Problems Affecting Truck Thermostat Housings
Despite their robust appearance, thermostat housings are prone to several issues that can compromise the cooling system’s efficiency and lead to engine damage. Recognizing these problems early is crucial for timely intervention and preventing more severe, costly repairs.
1. Coolant Leaks [1]
This is by far the most prevalent and immediately noticeable issue. Leaks can occur due to several reasons, each with distinct characteristics:
- Cracked Housing: Plastic or composite housings are particularly susceptible to cracking over time due to constant exposure to extreme temperature fluctuations (thermal cycling) and chemical degradation from coolant. These cracks often propagate from stress points around bolt holes, hose connections, or thin sections of the housing. Even aluminum housings can crack under excessive stress, impact, or if mounting bolts are overtightened. The cracks can be hairline initially, only leaking under pressure, and gradually worsen.
- Warped Housing: Overheating events, improper torque during installation, or uneven thermal expansion and contraction can warp the housing’s mating surface. This distortion prevents a proper, flat seal with the engine block or cylinder head, creating microscopic gaps that allow coolant to escape, especially when the system is pressurized.
- Failed Gasket or O-ring: The seals (gaskets or O-rings) positioned between the housing and the engine, or between different housing components, are wear items. They can degrade, harden, shrink, or become brittle over time due to heat, pressure, and chemical exposure from the coolant. Once compromised, they lose their ability to create a watertight seal, leading to leaks. This is a very common point of failure and often the easiest to fix if caught early.
- Loose Fasteners: Constant vibrations from heavy-duty operation, especially on rough roads or during prolonged idling, can cause mounting bolts to loosen over time. This reduces the clamping force on the gasket, leading to a compromised seal and subsequent coolant leaks. Regular inspection and proper torque application are essential to prevent this.
- Corrosion: Inadequate coolant maintenance, such as using incorrect coolant types or neglecting coolant changes, can lead to internal and external corrosion. This is particularly true for metal housings (aluminum or cast iron), where pitting and material degradation can create pathways for leaks. Electrolysis, an electrochemical reaction caused by stray electrical currents in the coolant, can significantly accelerate this corrosion, sometimes causing rapid and severe damage.
Symptoms: Visible coolant puddles under the truck (often green, orange, pink, or blue depending on coolant type), a distinct sweet smell of coolant, frequent need to top up the coolant reservoir, and white or colored crusty residue around the housing joints. For Sinotruk (HOWO) and Shacman trucks, which are often subjected to demanding operational environments, regular visual checks of the thermostat housing area are vital to catch these leaks early.
2. Thermostat Malfunction (Stuck Open or Closed) [2]
While the thermostat itself is a separate component, its proper function is intrinsically linked to the housing. A faulty thermostat often necessitates opening the housing, and sometimes the housing’s condition can contribute to the thermostat’s malfunction.
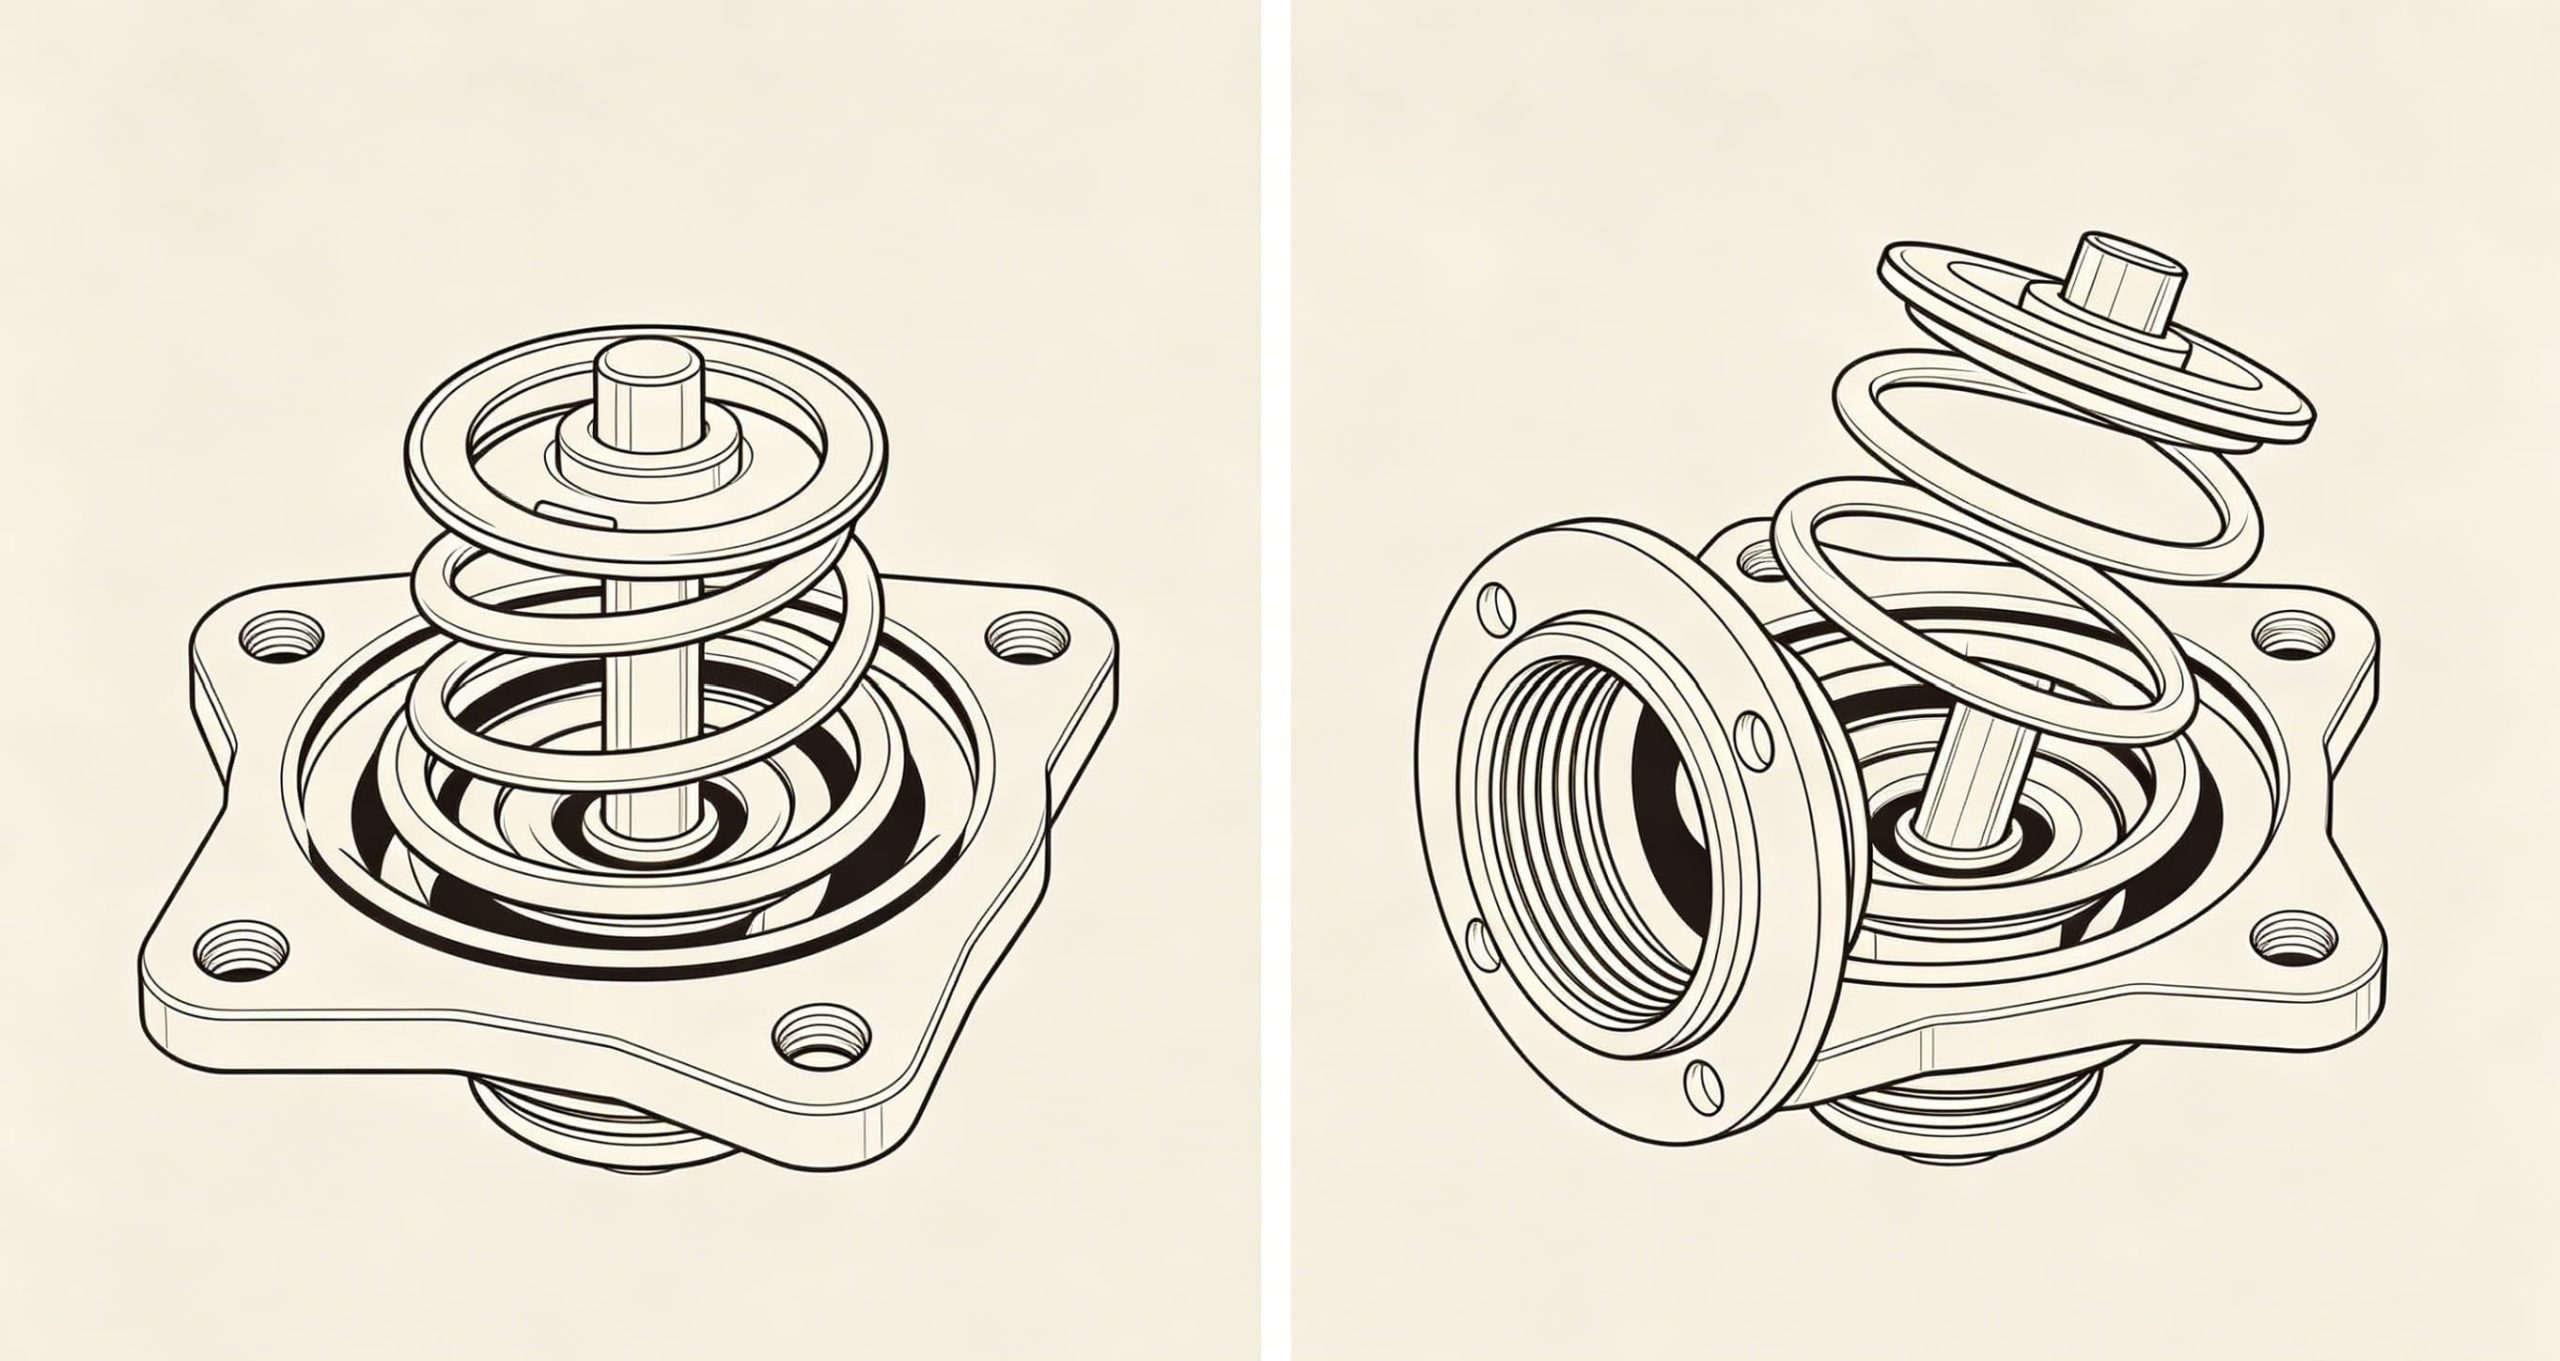
- Stuck Closed: This is the most dangerous failure mode. The thermostat fails to open, preventing hot coolant from flowing to the radiator for cooling. This leads to rapid and severe engine overheating. Causes can include internal corrosion, a broken wax pellet (the temperature-sensing element), mechanical binding within the housing due to debris, or a manufacturing defect.
- Stuck Open: The thermostat remains open, allowing coolant to constantly circulate through the radiator, even when the engine is cold. The engine struggles to reach its optimal operating temperature, leading to prolonged warm-up times, reduced fuel efficiency, increased emissions, and poor cabin heating. This can be caused by a broken spring, debris holding the valve open, or a housing design flaw that prevents proper closure.
Symptoms: Engine overheating (stuck closed, often accompanied by steam from under the hood and a rapidly rising temperature gauge), engine running too cool (stuck open, with the temperature gauge consistently below normal operating range), erratic temperature gauge readings (if the thermostat is partially sticking), and weak or no cabin heat. These issues can significantly impact the performance and fuel economy of FAW and Dongfeng trucks, especially during long hauls or in varying climates.
3. Sensor Port Damage
Many thermostat housings incorporate ports for coolant temperature sensors. These ports are crucial for the engine’s ECU to monitor and manage engine temperature. Problems can arise if:
- Cracked Ports: The sensor port itself can crack, especially in plastic housings, leading to coolant leaks or an insecure sensor fit.
- Loose Sensor: An improperly seated or loose sensor can cause leaks or provide inaccurate temperature readings.
- Stripped Threads: Overtightening a sensor can strip the threads in the housing, making it impossible to secure the sensor properly and creating a leak path.
Inaccurate temperature readings can mislead the ECU, affecting fuel delivery, ignition timing, and fan operation, potentially causing further engine damage or reduced efficiency.
4. Degradation of Integrated Components
Some modern thermostat housings are complex assemblies that integrate multiple components beyond just the thermostat, such as additional coolant pipes, heater hose connections, bypass valves, or even auxiliary coolant pumps. Failure of any integrated part within this assembly can necessitate replacement of the entire unit, even if the main housing body appears intact. This complexity can increase replacement costs and make diagnosis more challenging, as a failure in one small integrated part means replacing a larger, more expensive assembly.
5. Air Pockets and Bleeding Issues
While not a direct housing failure, the design and location of the thermostat housing can sometimes contribute to air pockets becoming trapped in the cooling system during refilling after maintenance or repair. Trapped air can lead to localized overheating, erratic temperature readings, reduced cooling efficiency, and even damage to the water pump (cavitation). Some housings incorporate a jiggle valve or bleed hole in the thermostat to facilitate air removal, but improper installation or a faulty thermostat can negate this feature, leading to persistent air lock issues.
Diagnosing Thermostat Housing Problems: A Comprehensive Approach
Accurate diagnosis is the cornerstone of effective repair. A systematic approach helps identify whether the thermostat housing is the root cause of cooling system anomalies, saving time and preventing unnecessary component replacements.
1. Visual Inspection
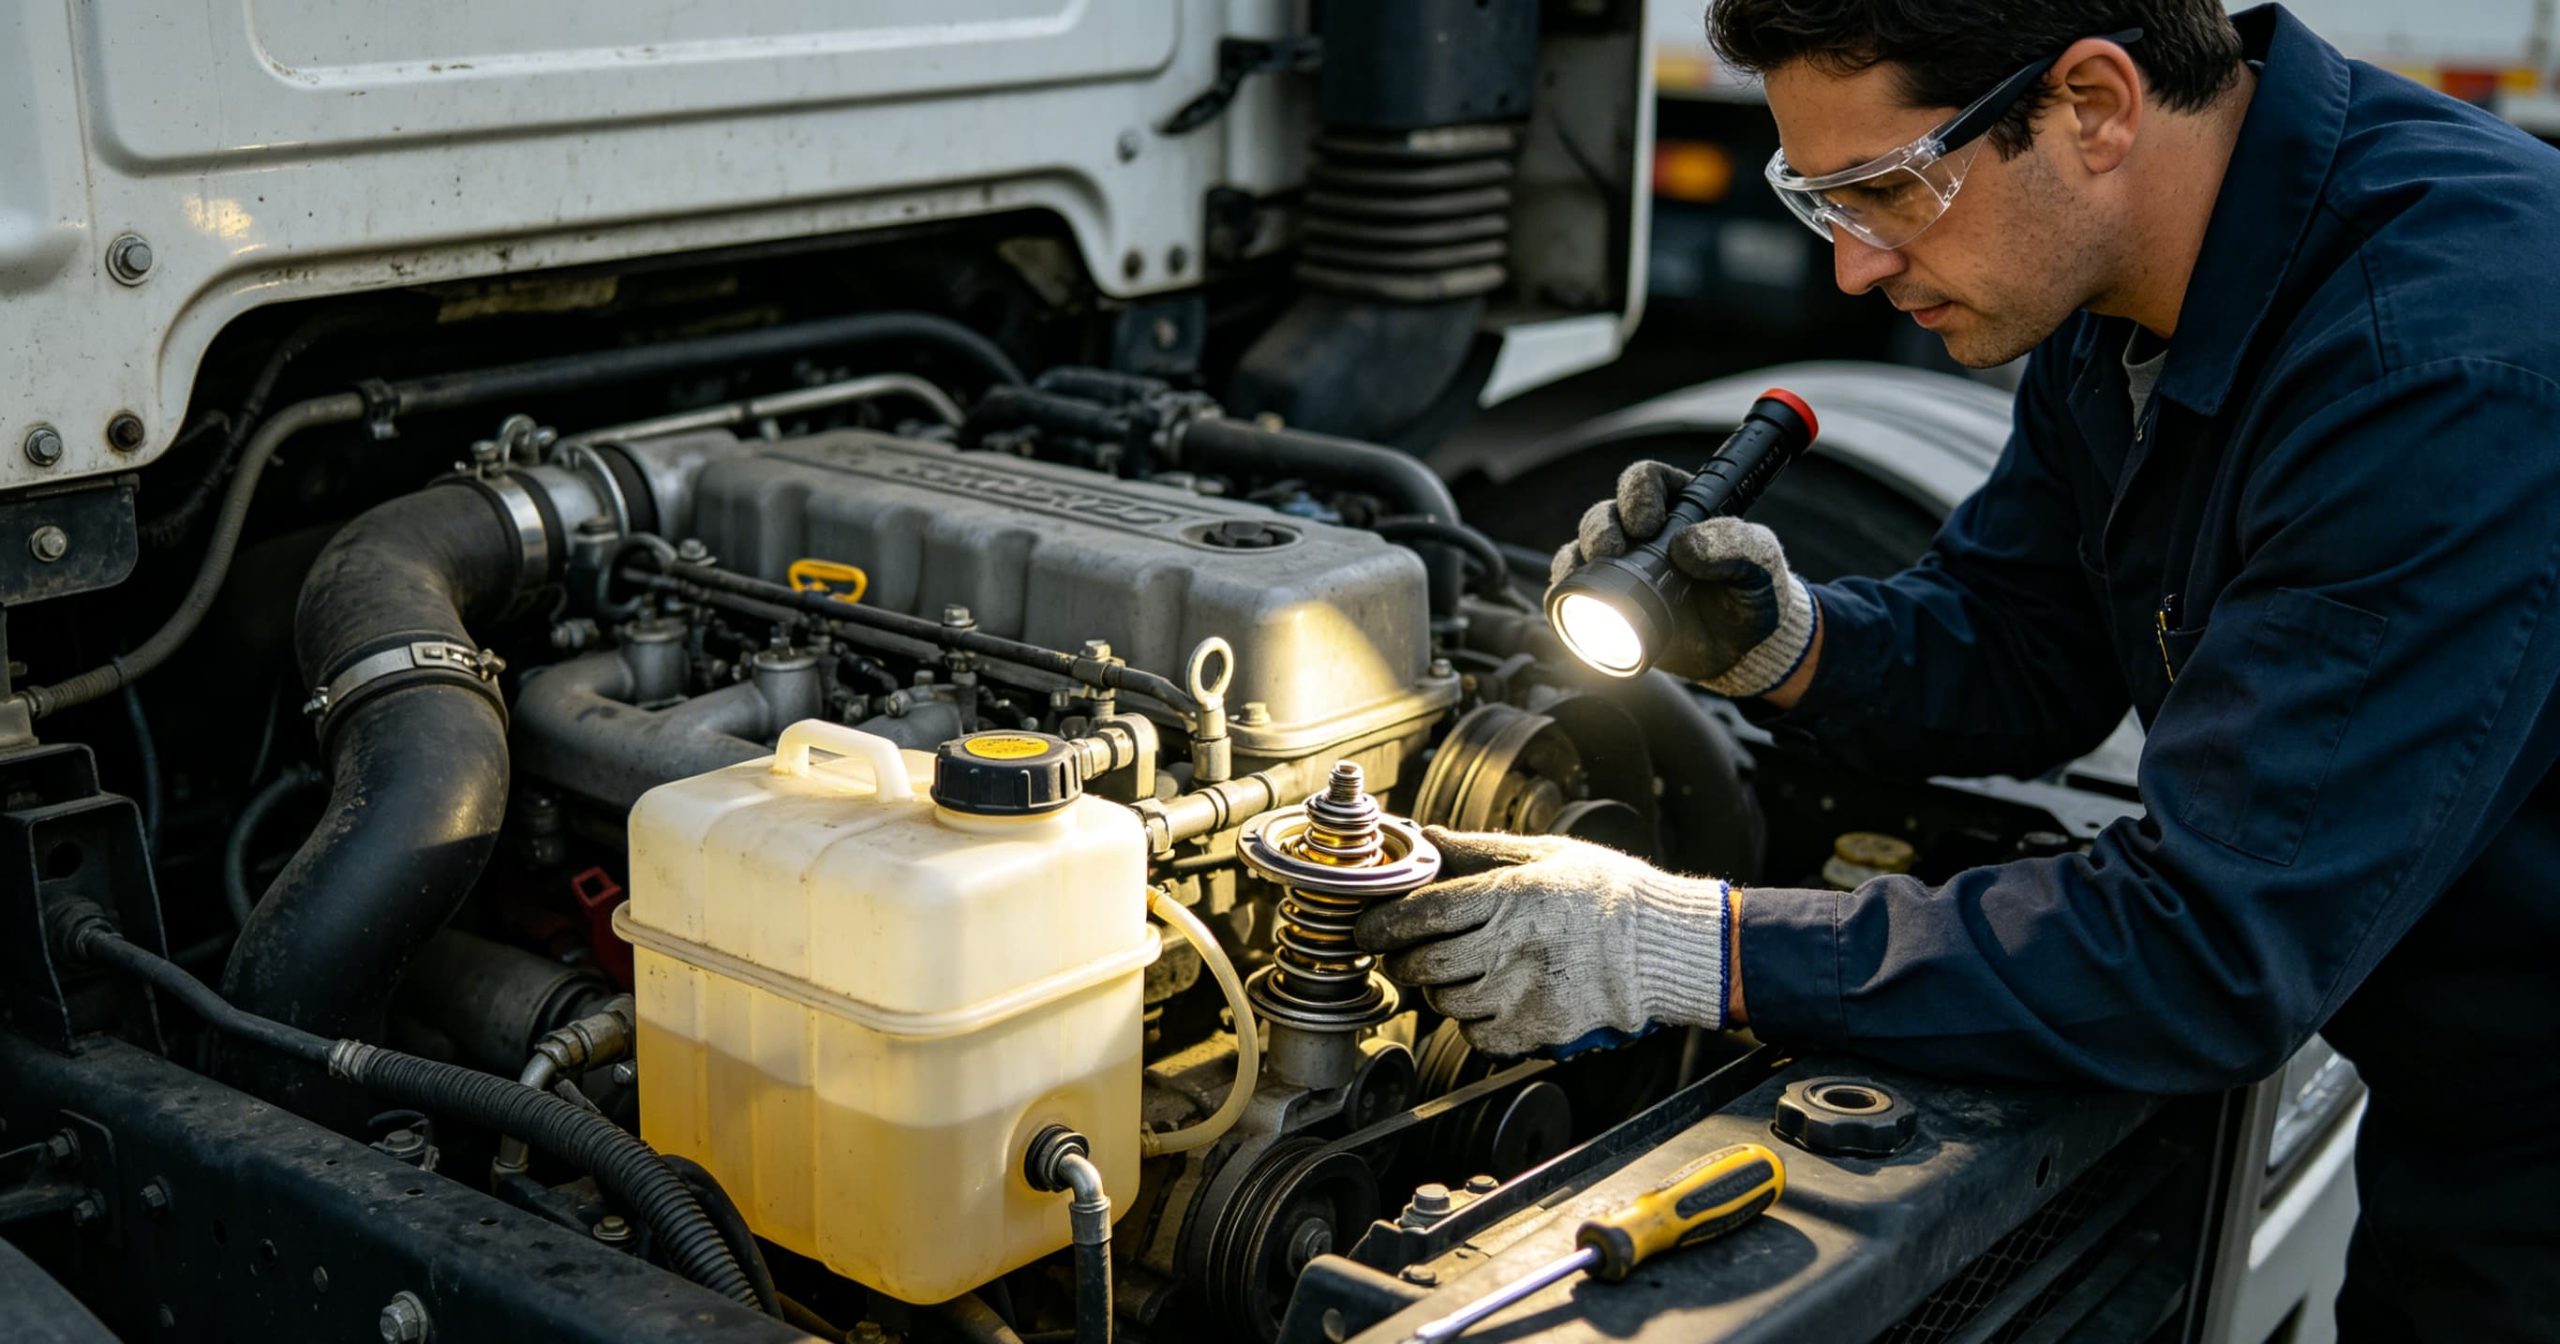
- External Leak Check: Begin with a thorough visual inspection of the thermostat housing and its surrounding areas. Look for any signs of coolant leaks, which can manifest as colored stains (green, orange, pink, or blue depending on coolant type), wet spots, or dried crusty residue. Pay close attention to the seams where the housing connects to the engine, around bolt heads, and where hoses attach. Use a powerful flashlight to illuminate hard-to-reach areas and inspect from multiple angles.
- Housing Integrity: Examine the housing material for visible cracks, especially in plastic or composite units. These cracks often appear as fine lines that can be difficult to spot initially. Check for signs of warping or distortion, particularly along the mating surfaces. Pay attention to areas around bolt holes and hose connections, as these are common stress points where fatigue cracks can initiate.
- Hose and Clamp Condition: Inspect the upper and lower radiator hoses connected to the housing for signs of wear such as cracks, bulges, soft spots (indicating internal delamination or weakening), or excessive hardness (indicating heat damage and embrittlement). Ensure all hose clamps are tight and properly seated. Loose or corroded clamps are a very common cause of coolant leaks and should be addressed immediately.
- Coolant Level and Condition: Check the coolant level in the expansion tank or radiator. A consistently low level, even without visible puddles, strongly suggests a slow leak somewhere in the system. Observe the coolant’s color and clarity; it should be clean and vibrant. Discoloration (e.g., rusty brown), cloudiness, or the presence of oil, sludge, or particulate matter suggests internal corrosion, head gasket issues, or contamination, all of which can negatively impact the thermostat housing and other cooling components.
2. Pressure Testing the Cooling System [1]
A cooling system pressure tester is an invaluable tool for diagnosing leaks that are not immediately obvious during a visual inspection. This tool allows you to pressurize the cooling system to its specified operating pressure (usually indicated on the radiator cap) while the engine is cold. Any drop in pressure over a period (e.g., 15-30 minutes) indicates a leak. You can then visually inspect the thermostat housing and other components under pressure to pinpoint the exact source of the leak. This method is highly effective for detecting hairline cracks or gasket failures that only leak under pressure. Listen carefully for hissing sounds, and look for dripping coolant or bubbling, especially around the thermostat housing, hoses, and radiator. A UV dye can also be added to the coolant to make small leaks more visible under a black light.
3. Monitoring Engine Temperature
- Dashboard Gauge Awareness: Train drivers and operators to pay close attention to the engine temperature gauge during various driving conditions (idle, highway, uphill, under heavy load). Consistent operation above the normal range (overheating) or erratic fluctuations are strong indicators of cooling system issues. Note the exact temperature readings if possible, and how they correlate with driving conditions.
- OBD-II Scanner Diagnostics: For modern heavy-duty trucks, an OBD-II scanner is an essential diagnostic tool. It can read diagnostic trouble codes (DTCs) related to engine temperature (e.g., P0128 for coolant temperature below regulating temperature, P0125 for insufficient coolant temperature for closed loop fuel control) and provide real-time coolant temperature data. This data can help confirm if the thermostat is stuck open or closed, and also help rule out sensor malfunctions as the primary cause of temperature issues.
- Infrared Thermometer Analysis: An infrared thermometer can be used to measure the temperature of different parts of the cooling system (e.g., engine block near the thermostat, upper and lower radiator hoses, radiator core, heater core inlet/outlet) to identify temperature differentials that suggest flow restrictions or thermostat malfunctions. For instance, if the engine is hot but the upper radiator hose remains cold, it strongly suggests a thermostat stuck closed. If both hoses are cold and the engine is overheating, it points to a lack of coolant circulation.
4. Heater Performance Check
In cold weather, if the cabin heater blows only lukewarm or cold air even after the engine has reached its normal operating temperature, it can be a symptom of a thermostat stuck open (preventing the engine from warming up sufficiently) or a significant coolant leak leading to low coolant levels. This is particularly noticeable in Foton and Dongfeng trucks during winter operations, where effective cabin heating is crucial for driver comfort and safety. A properly functioning cooling system should provide ample cabin heat once the engine is warm.
5. Engine Performance Symptoms
Beyond temperature, a faulty thermostat housing or a thermostat malfunction can indirectly affect engine performance and efficiency. A perpetually cold engine (due to a stuck-open thermostat) can lead to:
- Reduced Fuel Economy: The engine’s ECU will keep the fuel mixture richer, assuming the engine is still warming up to compensate for lower combustion efficiency. This leads to increased fuel consumption.
- Increased Emissions: Incomplete combustion due to suboptimal operating temperatures results in higher levels of harmful emissions.
- Sluggish Performance: The engine may not deliver its full power output, feeling less responsive, as the ECU may limit performance until optimal operating temperature is reached.
- Check Engine Light Illumination: As mentioned, codes like P0128 (Coolant Temperature Below Thermostat Regulating Temperature) are common for a stuck-open thermostat, triggering the Check Engine Light.
- Oil Sludge Formation: Prolonged operation at sub-optimal temperatures can prevent moisture and contaminants from burning off in the engine oil, leading to accelerated oil sludge formation, which can damage internal engine components.
Troubleshooting Common Thermostat Housing Issues
Before resorting to full replacement, some issues can be troubleshooted or temporarily managed. However, for critical components like the thermostat housing, a permanent and proper fix is always recommended to ensure long-term reliability and prevent further damage.
1. Addressing Minor Leaks
- Tighten Clamps: If a leak is detected around a hose connection to the thermostat housing, first try tightening the hose clamp. Ensure it’s not overtightened, which can damage the hose or the housing’s connection point. Inspect the hose for damage as well.
- Gasket/O-ring Replacement: For leaks between the housing and the engine block/cylinder head, a new gasket or O-ring might resolve the issue, provided the housing itself is not cracked, warped, or severely corroded. This is a less invasive and often more cost-effective repair than replacing the entire housing, but requires careful cleaning of mating surfaces.
- Coolant Stop-Leak Products: While tempting for a quick fix, these products are generally not recommended for heavy-duty trucks. They can contain particulates that clog radiator cores, heater cores, and other vital cooling system passages, leading to more severe problems down the line. Use only as a last resort for emergency situations to get the truck to a repair facility, and plan for a thorough system flush afterward.
2. Dealing with Air Pockets
Trapped air in the cooling system can mimic thermostat issues and cause erratic temperature readings or localized overheating. Proper bleeding is crucial:
- Proper Bleeding Procedure: After any cooling system work, ensure the system is properly bled of air. This often involves filling the system slowly, running the engine with the heater on high, and repeatedly squeezing radiator hoses to dislodge air bubbles. Some trucks have specific bleed screws or procedures that must be followed. Consult the service manual.
- Coolant Funnel Systems: Specialized coolant funnels that attach to the radiator neck can help prevent air from being trapped during refilling and allow air to escape as the engine warms up.
- Vacuum Fill Tool: For stubborn air pockets or complex cooling systems, a vacuum fill tool can be used to create a vacuum in the cooling system before refilling. This method pulls all air out and ensures a complete, air-free fill, significantly reducing the risk of air locks.
3. Verifying Sensor Functionality
If temperature readings are erratic or incorrect, the coolant temperature sensor itself might be faulty, not the housing:
- Resistance Check: The coolant temperature sensor can be tested for resistance at various temperatures using a multimeter (refer to service manual specifications for expected values).
- Wiring Inspection: Check the wiring harness and connectors leading to the temperature sensor for corrosion, damage, or loose connections. A damaged wire can cause intermittent or incorrect readings.
- Diagnostic Scan: An OBD-II scanner can often identify if a temperature sensor is reporting implausible data, distinguishing between a sensor issue and a mechanical thermostat problem.
Thermostat Housing Replacement Guide for Heavy-Duty Trucks
When diagnosis confirms a faulty thermostat housing, replacement is typically the most reliable and long-term solution. Attempting to repair a cracked or warped housing is often a temporary fix that can lead to recurring problems and ultimately more expensive damage. This guide outlines the general steps involved, but always consult your truck’s specific service manual for precise instructions, torque specifications, and critical safety protocols relevant to your Sinotruk (HOWO), Shacman, FAW, Foton, or Dongfeng model.
When to Replace the Thermostat Housing
- Confirmed Leaks: Any persistent coolant leak from the housing that cannot be resolved by simply tightening fasteners or replacing a gasket. This includes hairline cracks that only leak under pressure, which will inevitably worsen over time.
- Physical Damage: Visible cracks, severe warping, or significant corrosion of the housing material that compromises its structural integrity or sealing capability. This is especially critical for plastic housings that have become brittle.
- Thermostat Replacement: It is often considered best practice to replace the housing and its gasket/O-ring whenever the thermostat itself is replaced, especially if the housing is plastic or shows signs of age and thermal fatigue. This prevents a new thermostat from being installed into a compromised housing, ensuring the entire assembly is refreshed.
- Integrated Component Failure: If the housing is part of a larger, more complex assembly and an integrated component (e.g., an auxiliary coolant pump, a specific sensor port, or a bypass valve) fails, the entire housing unit may need replacement, as individual components might not be serviceable or cost-effective to repair separately.
- Preventive Maintenance: For high-mileage heavy-duty trucks, especially those operating in extreme conditions or with a history of cooling system issues, replacing the thermostat housing as part of a major cooling system overhaul (e.g., radiator or water pump replacement) can prevent future failures and unscheduled downtime.
Selecting the Right Replacement Part
Choosing a high-quality replacement thermostat housing is crucial for the longevity and reliability of your heavy-duty truck. Inferior parts can lead to premature failure and repeated repairs. Consider these factors:
- OEM or High-Quality Aftermarket: While OEM (Original Equipment Manufacturer) parts guarantee exact fit and performance, high-quality aftermarket options from reputable suppliers can offer comparable performance at a competitive price. Always ensure the aftermarket part meets or exceeds original specifications. Look for certifications or quality assurance marks from recognized industry bodies.
- Material Upgrade: If your original housing was plastic and failed prematurely due to cracking, consider upgrading to a cast aluminum aftermarket unit if available for your Sinotruk (HOWO), Shacman, or FAW model. These often offer enhanced durability, better heat dissipation, and superior resistance to thermal cycling and chemical degradation, providing a more robust and long-lasting solution.
- Complete Assembly: Some replacement housings come as a complete assembly with the thermostat and sensors pre-installed. This can simplify the replacement process, reduce installation errors, and ensure compatibility between components. While potentially more expensive upfront, it can be a time-saver and reduce the risk of incorrect assembly.
- Brand Compatibility: Always verify that the replacement housing is specifically designed for your truck’s make, model, and engine type (e.g., Foton, Dongfeng). Using an incorrect part can lead to fitment issues, leaks, and improper cooling system function, potentially causing severe engine damage. Cross-reference part numbers carefully.
- Gaskets/Seals Included: Ensure the new housing comes with all necessary gaskets or O-rings. If not, purchase them separately to ensure a proper, leak-free seal. Never reuse old gaskets or O-rings.
Step-by-Step Replacement Procedure (General Guide)
Disclaimer: This is a general overview. Always refer to your heavy-duty truck’s specific service manual for detailed, model-specific instructions, torque specifications, and critical safety warnings. If you are not comfortable performing this repair, or lack the necessary tools and experience, seek professional assistance. Improper installation can lead to severe engine damage.
- Safety Precautions:
- Ensure the engine is completely cool to avoid burns from hot coolant or engine components. This is paramount.
- Disconnect the negative terminal of the battery to prevent electrical hazards and accidental activation of cooling fans.
- Wear appropriate personal protective equipment, including safety glasses, chemical-resistant gloves, and long sleeves.
- Place a large drain pan beneath the radiator drain cock and the thermostat housing area to catch draining coolant.
- Work in a well-ventilated area to avoid inhaling coolant fumes.
- Ensure the truck is on a level surface and properly secured (e.g., parking brake engaged, wheels chocked).
- Drain Coolant:
- Open the radiator drain cock (petcock) and remove the radiator cap to allow the coolant to drain completely into the pan.
- If the coolant is old, discolored, or contaminated, this is an opportune time for a full system flush to remove rust, scale, and debris.
- Properly dispose of the old coolant according to local environmental regulations. Coolant is toxic and harmful to the environment.
- Access the Thermostat Housing:
- Identify the exact location of the thermostat housing. It’s typically found at the engine’s coolant outlet, often where the upper radiator hose connects to the engine.
- You may need to remove other components to gain clear access, such as air intake ducts, engine covers, wiring harnesses, or even the fan shroud on some models. Carefully label any disconnected hoses, electrical connectors, or removed components to ensure correct reassembly. Taking photos before disassembly can be very helpful.
- Remove Hoses and Sensors:
- Loosen the hose clamp(s) on the radiator hose(s) connected to the thermostat housing and carefully detach the hose(s). If hoses are stuck, use a hose pick or flat-head screwdriver to gently break the seal, being careful not to damage the hose.
- If there are any electrical connectors for temperature sensors attached to the housing, carefully disconnect them. Be gentle with plastic clips and wiring to avoid breakage.
- Remove any other small hoses (e.g., heater hoses, bypass hoses) connected to the housing.
- Remove the Old Thermostat Housing:
- Locate and remove the mounting bolts that secure the thermostat housing to the engine block or cylinder head. These are often 10mm or 13mm bolts. Keep track of bolt lengths and locations if they vary, as using the wrong bolt in the wrong hole can cause damage.
- Gently pry the housing loose. Be prepared for residual coolant to spill out. Use a plastic pry tool to avoid damaging mating surfaces on the engine.
- Remove the old thermostat and gasket/O-ring from the housing or engine. Note its orientation (e.g., which way the jiggle valve faces) for correct installation of the new one.
- Clean Mounting Surfaces:
- Thoroughly clean the mating surfaces on the engine block/cylinder head and the new thermostat housing. This is a critical step for a leak-free seal. Use a plastic scraper or a soft wire brush to remove any old gasket material, corrosion, or debris. Avoid using metal scrapers that can gouge or scratch the aluminum or cast iron surfaces.
- Ensure the surfaces are perfectly smooth, clean, and dry to guarantee a proper seal with the new gasket. Clean any bolt holes as well to ensure bolts can be torqued correctly.
- Install New Thermostat and Gasket/O-ring:
- Install the new thermostat into its designated recess, ensuring it is oriented correctly (e.g., the jiggle valve or bleed hole facing upwards if specified by the manufacturer). Incorrect orientation can lead to air pockets and improper cooling.
- Apply a thin, even coat of RTV sealant (if recommended by the manufacturer, typically a high-temperature, coolant-resistant type) to both sides of the new gasket or lubricate the O-ring with a small amount of clean coolant. This aids in sealing and prevents the gasket from sticking or tearing during installation.
- Position the new gasket/O-ring onto the housing or engine mating surface.
- Install New Thermostat Housing:
- Carefully position the new thermostat housing onto the engine, aligning it with the mounting bolt holes.
- Insert the mounting bolts and hand-tighten them to ensure they are properly threaded.
- Using a calibrated torque wrench, tighten the bolts to the manufacturer’s specified torque sequence and values. Overtightening can crack plastic housings, strip threads in aluminum, or warp metal housings; undertightening can lead to leaks. Follow a crisscross pattern if multiple bolts are present to ensure even clamping pressure across the gasket.
- Reconnect Components:
- Reattach the radiator hose(s) and secure them with new hose clamps if the old ones are worn or corroded. Ensure hoses are fully seated onto their connection points.
- Reconnect any electrical connectors to the temperature sensors. Ensure they click into place securely.
- Reinstall any components that were removed for access (air intake, engine covers, fan shroud, etc.). Double-check that all connections are secure and all fasteners are tightened.
- Refill Cooling System and Bleed Air:
- Refill the cooling system with the manufacturer-recommended coolant mixture (typically a 50/50 blend of antifreeze/coolant and distilled water). Use a specialized coolant funnel that creates a vacuum seal to aid in filling and bleeding.
- Follow the truck’s specific bleeding procedure to remove any trapped air from the system. This often involves running the engine with the heater on high and the radiator cap off (or using a specialized funnel) until no more air bubbles appear. Repeatedly squeezing radiator hoses can help dislodge air.
- Monitor the coolant level as the engine warms up and add more as needed until the level stabilizes.
- Test for Leaks and Functionality:
- Start the engine and allow it to reach operating temperature. Monitor the temperature gauge closely for normal operation.
- Visually inspect the thermostat housing and all connections for any signs of leaks.
- Once the engine is warm, perform another pressure test to confirm the system holds pressure.
- Take the truck for a short test drive, paying attention to the temperature gauge and heater performance. After the test drive, allow the engine to cool completely and recheck the coolant level, topping up if necessary.
Preventive Maintenance for Thermostat Housing Longevity
Proactive maintenance is the most effective strategy to extend the life of your thermostat housing and prevent costly cooling system failures. Implementing a robust maintenance schedule can significantly reduce downtime and repair expenses for your heavy-duty trucks.
1. Regular Coolant System Checks
- Coolant Level and Condition: Routinely check the coolant level in the expansion tank. A consistent drop in level often indicates a leak. Inspect the coolant for clarity and color; it should be clean and vibrant. Discoloration, cloudiness, or the presence of particles suggests contamination or degradation.
- Coolant Change Intervals: Adhere strictly to the manufacturer’s recommended coolant change intervals. Over time, coolant loses its anti-corrosive properties and can become acidic, accelerating the degradation of plastic and metal components, including the thermostat housing.
- Correct Coolant Type: Always use the specific type of coolant (e.g., OAT, HOAT, IAT) recommended for your heavy-duty truck’s engine. Mixing incompatible coolants can lead to chemical reactions, gel formation, and severe corrosion.
2. Inspect Hoses and Clamps
- Hose Integrity: Periodically inspect all radiator and heater hoses connected to the thermostat housing. Look for signs of wear such as cracks, bulges, soft spots (indicating internal delamination), or excessive hardness. Replace any compromised hoses immediately.
- Clamp Security: Ensure all hose clamps are tight and properly positioned. Loose clamps are a common cause of coolant leaks. Consider upgrading to constant-tension clamps for better long-term sealing.
3. Monitor Engine Temperature and Performance
- Dashboard Gauge Awareness: Train drivers and operators to pay close attention to the engine temperature gauge. Any unusual fluctuations or consistent readings above the normal operating range should be reported and investigated promptly.
- Heater Performance: In colder climates, a sudden decrease in cabin heater effectiveness can be an early warning sign of cooling system issues, including a stuck-open thermostat or low coolant levels due to a housing leak.
4. Address Small Leaks Promptly
Even minor coolant leaks should not be ignored. A small leak can quickly escalate into a major problem, especially under the high pressures and temperatures of a heavy-duty truck’s cooling system. Promptly identifying and repairing leaks, whether from the thermostat housing or elsewhere, can prevent significant engine damage and costly breakdowns.
5. Consider Material Upgrades
If your truck’s original thermostat housing was made of plastic and failed prematurely due to cracking, consider replacing it with a high-quality aftermarket aluminum housing, if available for your model (e.g., Sinotruk (HOWO), Shacman, FAW). While the initial cost might be slightly higher, the enhanced durability and resistance to thermal cycling can provide long-term savings and reliability.
The Advantage of Sourcing from a Specialized Exporter
For heavy-duty truck owners and fleet managers globally, securing reliable, high-quality replacement parts is a cornerstone of operational success. As a specialized exporter of Chinese heavy-duty truck components, we offer a distinct advantage in providing thermostat housings and related cooling system parts for prominent brands like Sinotruk (HOWO), Shacman, FAW (Jiefang),Foton, and Dongfeng. Our commitment extends beyond merely supplying parts; we provide a comprehensive service designed to meet the rigorous demands of the international heavy-duty trucking industry.
We pride ourselves on offering products that adhere to stringent quality standards, ensuring that every thermostat housing you receive is built for durability and precise fitment. Our extensive inventory means that you can find the exact part you need, minimizing search time and reducing vehicle downtime. Furthermore, our efficient global logistics network guarantees prompt and reliable delivery to your location, anywhere in the world. We understand that in the heavy-duty sector, time is money, and our streamlined supply chain is designed to keep your operations moving.
Beyond product supply, we offer expert technical support, assisting with part identification, providing detailed specifications, and offering troubleshooting advice. This holistic approach ensures that you not only receive the correct part but also have the knowledge to install and maintain it effectively. Explore our Product Brand Page to see our full range of offerings tailored for specific truck manufacturers, and delve into our Product System Page for components categorized by vehicle system. Our Cooperative Cases section showcases our successful partnerships and our unwavering dedication to client satisfaction and long-term collaboration. For any direct inquiries, technical consultations, or to discuss your specific needs, please do not hesitate to Contact Us. Learn more about our company philosophy, our dedication to quality, and our mission to support global heavy-duty trucking operations on our About Us page, or visit our Homepage for a complete overview of our services and products.
Frequently Asked Questions (FAQ) about Truck Thermostat Housings
Q1: What is the primary role of a thermostat housing in a heavy-duty truck?
A1: The primary role of a thermostat housing is to securely hold the engine thermostat in place and provide a sealed passage for coolant flow between the engine and the radiator. It ensures the thermostat can accurately regulate engine temperature by controlling coolant circulation, which is vital for preventing overheating or undercooling in heavy-duty trucks like **HOWO** and **Shacman**.
Q2: What are the most common signs of a failing thermostat housing?
A2: The most common signs include visible coolant leaks around the housing (often seen as colored puddles or crusty residue), frequent engine overheating or running too cool, and a consistently low coolant level in the expansion tank. In some cases, an erratic temperature gauge or a lack of cabin heat can also indicate a problem with the thermostat or its housing.
Q3: Can I drive my heavy-duty truck with a leaking thermostat housing?
A3: It is highly inadvisable to drive a heavy-duty truck with a leaking thermostat housing. Even a small leak can lead to significant coolant loss, causing the engine to overheat rapidly. Overheating can result in severe and costly engine damage, such as warped cylinder heads or blown head gaskets. It’s crucial to address any leaks promptly to ensure engine longevity and operational safety.
Q4: What causes thermostat housings to crack or warp?
A4: Thermostat housings, especially those made of plastic or composite materials, can crack or warp due to repeated exposure to extreme temperature fluctuations (thermal cycling), chemical degradation from coolant, or improper torque during installation. Over time, these materials can become brittle. Metal housings can also crack under excessive stress or impact, or corrode due to neglected coolant maintenance.
Q5: Should I replace the thermostat when replacing the housing?
A5: Yes, it is generally recommended to replace the thermostat along with its housing. Since the cooling system is already drained and disassembled, replacing both components simultaneously is a cost-effective preventive measure. This ensures that both critical parts of the temperature regulation system are new and functioning optimally, preventing potential future issues and saving labor costs.
Q6: What are the benefits of upgrading a plastic thermostat housing to an aluminum one?
A6: Upgrading a plastic thermostat housing to a cast aluminum unit, if available for your truck model (e.g., **FAW**, **Foton**), offers several benefits. Aluminum housings are significantly more durable, less susceptible to cracking or warping from thermal cycling, and generally more resistant to chemical degradation. This upgrade can provide enhanced long-term reliability and reduce the likelihood of future coolant leaks and associated engine problems.
Q7: How often should I check my truck’s coolant and thermostat housing?
A7: It is recommended to check your truck’s coolant level and visually inspect the thermostat housing for any signs of leaks or damage during every routine maintenance interval, typically every 10,000 to 15,000 kilometers or every few months. A more thorough inspection, including checking hose integrity and clamp security, should be part of your annual service routine or whenever you perform a coolant flush.
Q8: What role does coolant quality play in thermostat housing longevity?
A8: Coolant quality plays a critical role. Using the correct type of coolant and maintaining its proper concentration ensures that it provides adequate corrosion protection and heat transfer properties. Degraded, contaminated, or incompatible coolant can become acidic, leading to accelerated corrosion and erosion of both metal and plastic thermostat housings, gaskets, and other cooling system components, significantly shortening their lifespan.


