
Solenoid Valve Guide for Heavy-Duty Trucks

High-Quality Solenoid Valve for Heavy-Duty Trucks
A solenoid valve is an indispensable component in heavy-duty truck systems, serving as a critical control mechanism for fluid flow.
It acts as a precision on-off switch, directly regulating how fluids move through the truck’s key systems—from braking and fuel delivery to hydraulic operations.
Without a properly functioning solenoid valve, a truck’s performance can decline rapidly, leading to costly delays, safety risks, and unexpected breakdowns.
Whether you manage a fleet of heavy-duty vehicles or operate a single truck, understanding how to care for, install, and maintain solenoid valves is essential to keeping your operations running smoothly and efficiently.
Proper care, timely maintenance, and correct installation of solenoid valves are non-negotiable for avoiding costly downtime.
Even small issues with a solenoid valve can snowball into larger problems, affecting the entire truck’s functionality.
This guide breaks down everything you need to know—from spotting early signs of a faulty valve to choosing the right part, installing it correctly, and keeping it in top condition for long-term reliability.
By following the guidance below, you’ll be able to minimize repair costs, extend the life of your solenoid valves, and ensure your heavy-duty truck operates at its best, whether you’re on long hauls or daily local routes.
1. Common Signs of a Faulty Solenoid Valve
First and foremost, recognizing the early signs of a faulty solenoid valve is key to avoiding major system failures and expensive repairs.
Solenoid valves are critical to a truck’s operation, so even minor issues can have significant impacts. Being able to spot these signs quickly helps you address problems before they escalate.
One of the most obvious signs is unstable performance of the truck’s key systems. For example, if your truck’s brakes feel sluggish, unresponsive, or uneven, this may indicate a problem with the solenoid valve.
The valve may fail to open or close properly, interrupting the fluid flow needed for effective braking.
Abnormal fuel delivery is another clear indicator. If your truck experiences sputtering, unexpected stalling, or difficulty starting, the solenoid valve controlling fuel flow may be damaged.
This leads to reduced fuel efficiency and can even leave you stranded on the road if not addressed promptly.
In addition, unusual noises coming from the valve housing (such as clicking, buzzing, or rattling) are also warning signs.
These noises usually mean that the internal components of the solenoid valve are worn or misaligned.
Warning lights on the truck’s dashboard—especially those related to fluid pressure or the electrical system—also often indicate a solenoid valve malfunction.
Furthermore, leaks around the valve connections are undoubtedly a sign of trouble. These leaks usually come from worn seals or a faulty valve core, leading to fluid loss and reduced system efficiency.
Catching these leaks early can prevent further damage to other truck components and reduce repair costs.
2. Key Features of High-Quality Solenoid Valves
Not all solenoid valves are the same—especially those designed for heavy-duty trucks operating in harsh conditions.
The right solenoid valve must be able to withstand extreme temperatures, constant vibration, high pressure, and harsh environments.
Below are two key features to prioritize when choosing a solenoid valve for heavy-duty trucks.
2.1 Material and Durability
Top-tier solenoid valves are made of high-quality materials that can withstand the rigors of heavy-duty use.
The valve core should be made of durable materials such as brass or stainless steel, which are rust-resistant, corrosion-resistant, and wear-resistant.
These materials can also withstand extreme temperature fluctuations—from hot summers to cold winters—without deforming or being damaged.
The seals of the solenoid valve are equally important. Seals should be heat-resistant and fit tightly to prevent fluid leakage.
High-quality seals can also resist corrosive chemicals, road salt, and other contaminants that may damage the valve over time.
Well-constructed solenoid valves have a longer service life, reducing the need for frequent replacement and minimizing downtime.
2.2 Compatibility with Truck Systems
A solenoid valve can only work effectively if it is compatible with your truck’s specific make, model, and fluid system. Using an incompatible solenoid valve can lead to serious problems—from poor performance to complete system failure.
It can also damage other components such as fuel lines or hydraulic systems, resulting in more expensive repairs.
Before purchasing a solenoid valve, be sure to check your truck’s Original Equipment Manufacturer (OEM) specifications.
This ensures that the solenoid valve matches your truck’s fluid type, pressure requirements, and installation points.
Our solenoid valve compatibility tool simplifies this process, helping you quickly find the perfect fit and avoid costly mistakes.
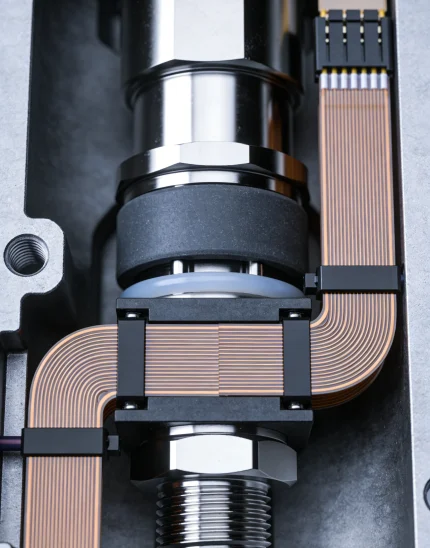
Precision Solenoid Valve Components
3. Step-by-Step Solenoid Valve Installation Guide
Proper installation is crucial to maximizing the service life of your solenoid valve and ensuring it works properly. Even minor mistakes during installation can lead to leaks, malfunctions, or premature damage.
Follow these simple step-by-step instructions to install your solenoid valve safely and effectively.
First, gather all the necessary tools: a set of wrenches, an electrical tester, new gaskets, and a clean cloth. It’s also a good idea to have your truck manual on hand for reference.
Park the truck on a flat, stable surface and engage the parking brake to prevent movement during installation.
Next, locate the old solenoid valve. It is typically mounted near the truck’s fluid lines, such as the fuel or hydraulic system.
Carefully disconnect the electrical connectors attached to the valve—use the electrical tester to ensure there is no power running to the connectors to avoid electrical shock.
Then, use a wrench to loosen and remove the bolts or fittings that secure the valve to the truck’s system.
Before installing the new solenoid valve, clean the mounting surface thoroughly with a clean cloth to remove any dirt, debris, or old gasket material. This ensures a tight, leak-free seal.
Place the new gasket on the mounting surface—make sure it aligns with the bolt holes to prevent misalignment during installation.
Align the new solenoid valve with the mounting holes and hand-tighten the bolts to secure it in place. Do not over-tighten the bolts, as this can damage the valve or the mounting surface.
Once the valve is securely fastened, reconnect the electrical connectors—ensure they click into place to guarantee a proper electrical connection.
Finally, turn on the truck’s power and test the solenoid valve. Check for any fluid leaks around the valve connections and listen for unusual noises.
If the valve operates smoothly without leaks or abnormal sounds, the installation is complete. If you notice any issues, double-check the connections and gasket alignment before re-testing.
4. Daily Maintenance Tips for Solenoid Valves
Regular maintenance is the key to extending the service life of your solenoid valve and preventing unexpected breakdowns.
Heavy-duty trucks operate in tough conditions, so solenoid valves are exposed to dirt, vibration, and temperature changes—all of which can affect performance over time.
Follow these simple maintenance tips to keep your solenoid valve in top condition.
First, inspect the solenoid valve regularly—at least once a month or after every 5,000 miles of operation. Check the valve housing for cracks, corrosion, or damage.
Examine the electrical connectors for signs of wear, looseness, or corrosion, as poor electrical connections can cause the valve to malfunction. Tighten any loose connectors and clean them with a dry cloth if needed.
Second, keep the valve and its surrounding area clean. Use a dry cloth to wipe away dirt, dust, and debris that can accumulate on the valve.
Avoid using harsh chemicals or high-pressure water, as these can damage the valve’s seals and internal components. If the valve is particularly dirty, use a mild cleaning solution and a soft brush to gently remove debris.
Third, check the seals regularly for signs of wear or damage. Worn or cracked seals are a common cause of fluid leaks, which can lead to reduced system efficiency and costly repairs.
Replace any damaged seals immediately with OEM-approved parts to ensure compatibility and performance.
Fourth, monitor the truck’s fluid levels and quality. Contaminated or low fluid can damage the solenoid valve’s internal components.
Follow the truck manufacturer’s recommendations for fluid type and replacement intervals.
Regularly change the fluid and replace the filter to keep the system clean and protect the valve.
Finally, avoid overloading the truck or operating it beyond its recommended capacity. Excessive pressure on the fluid system can strain the solenoid valve, leading to premature wear and failure.
Adhering to the truck’s load limits and operating guidelines helps protect the valve and other critical components.

Solenoid Valve Routine Maintenance
5. Troubleshooting Common Solenoid Valve Issues
Even with proper maintenance, solenoid valves can sometimes malfunction. Knowing how to troubleshoot common issues can save you time and money and help you get your truck back on the road quickly.
Below are common solenoid valve problems and step-by-step solutions.
Solution: First, check the electrical connections. Ensure the connectors are securely attached and free of corrosion.
Use an electrical tester to check if power is reaching the valve—if not, check the truck’s fuse, wiring, and electrical system for faults.
If power is reaching the valve but it still doesn’t operate, the valve’s internal coil may be burned out. In this case, replace the solenoid valve with a new OEM-compatible unit.
Solution: Inspect the valve’s gaskets and seals for wear, cracks, or misalignment.
Replace any damaged gaskets or seals with OEM-approved parts. Check the bolts securing the valve—if they are loose, tighten them to the recommended torque.
If the valve housing is cracked, the valve must be replaced, as cracks cannot be repaired effectively.
Solution: Check for loose electrical connections or corroded terminals.
Clean the connectors and tighten them securely. Inspect the truck’s electrical system for voltage fluctuations, which can cause intermittent operation.
If the problem persists, the valve’s internal components may be worn or misaligned—consider replacing the valve to ensure consistent performance.
Disassemble the valve (if possible) and clean the internal components with a mild cleaning solution.
If the valve is severely clogged or damaged, replace it. Also, check the truck’s fluid filter—if it’s clogged, replace it to prevent further contamination.